Introduction
Overview
Teaching: 15 min
Exercises: 0 minQuestions
What is Palmetto?
Objectives
Palmetto is a supercomputing cluster: a set of powerful computers that are connected to each other. It is built and maintained by Clemson University, and is located off campus, close to Anderson SC, in a dedicated building which is powered by a dedicated power plant.

Currently, the Palmetto cluster is ranked at #392 in the list of the world’s most powerful computers (#9 among the United States’ universities).
The Palmetto cluster is maintained by two teams: a team of system administrators, who work directly at the cluster, and monitors its hardware and operating system, and a team of research facilitators, who work with the Palmetto users. The two teams work very closely together. As research facilitators, we provide training workshops, online help and support, and in-person office hours (which are currently on Zoom).

We maintain a very extensive website which hosts plenty of information for Palmetto users. We have ~1,800 people using Palmetto; they come from a variety of departments: Computer Science, Chemistry, Biology, Public Health, Engineering, Mathematics, Psychology, Forestry, etc. Palmetto accounts are free for Clemson faculty, staff, and students. Clemson faculty can buy priority access to the compute nodes, which will also give access to their collaborators outside Clemson. Students can get an educational account (which expires at the end of the semester) or a research account (which expires after they graduate).
Key Points
Palmetto is a very powerful high-performance computing cluster
Accessing the Palmetto Cluster
Overview
Teaching: 15 min
Exercises: 0 minQuestions
How can I access the Palmetto cluster from my local machine?
Objectives
SSH client, Terminal, MobaXTerm
Pametto is accessed using the SSH (“Secure shell”) protocol. Palmetto runs the SSH server; on your local machine, you will need to run SSH client which connects to a server using a command-line terminal. The commands that are entered on the terminal are processed by the server on Palmetto.
To start the SSH client on a Mac, you can open the Terminal Application (which is usually located in Applications → Utilities) and run the following:
ssh login.palmetto.clemson.edu
For Windows, first you need to download and install MobaXterm Home Edition.
It is important that you unzip the downloaded installer prior to installation. The zipped installer file contains an additional data file besides the installer executable. This data file is not accessible if the installer executable is called from inside the zipped file (something Windows allows you to do).
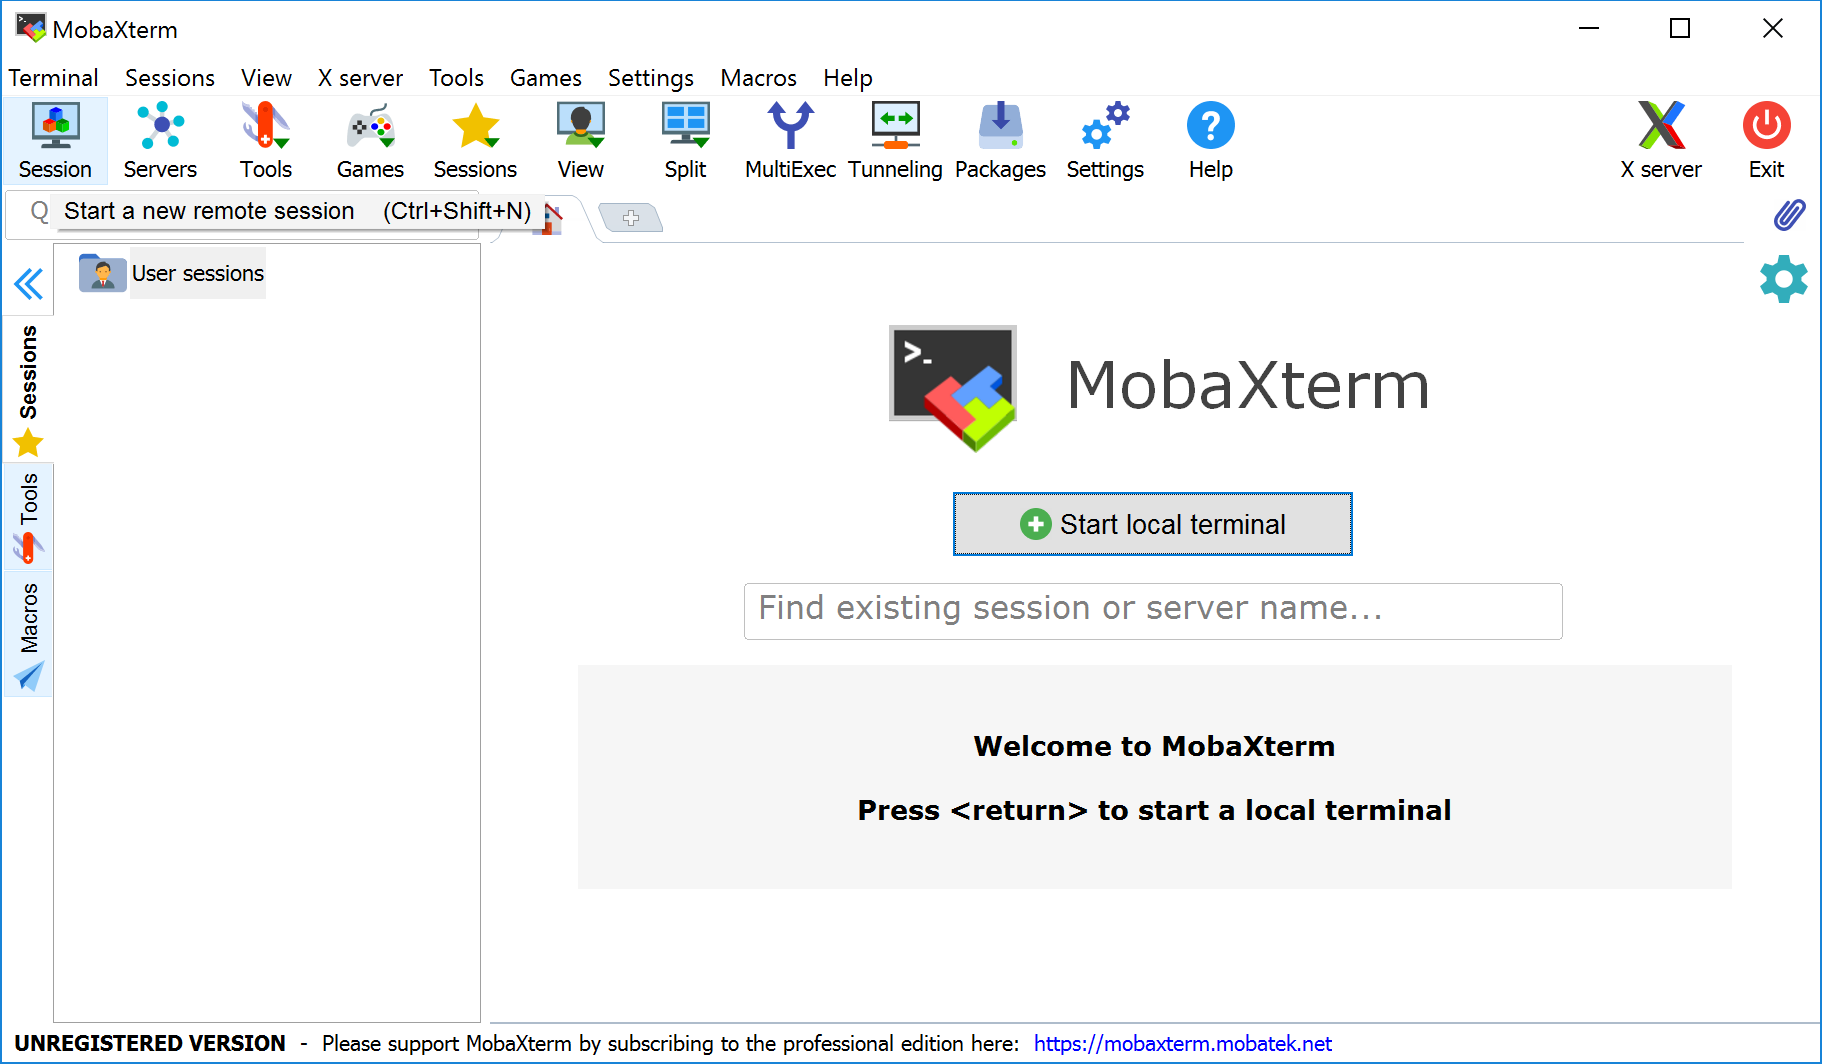
After MobaXterm starts, click the Session button.
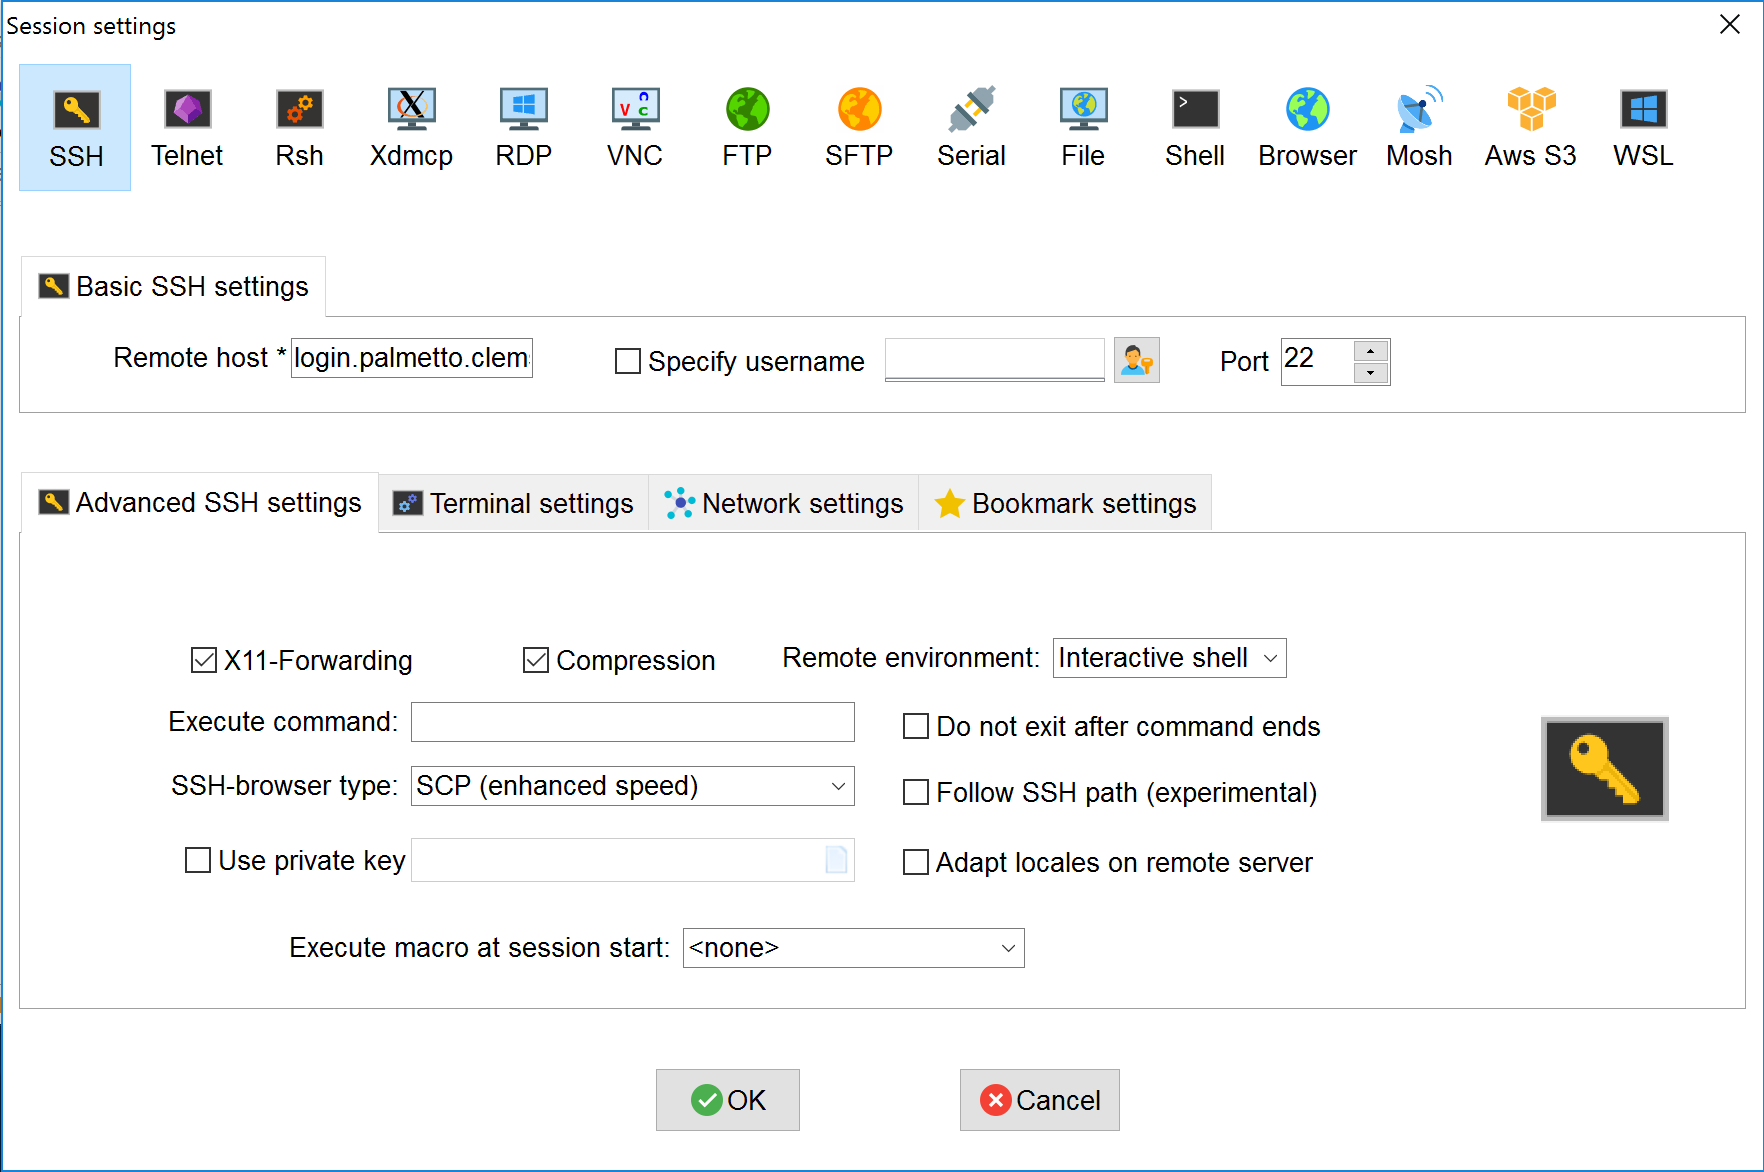
Select SSH session and use the following parameters (whichever required), then click OK:
- Remote host:
login.palmetto.clemson.edu - SSH-browser type: Enhanced SCP
- Port: 22
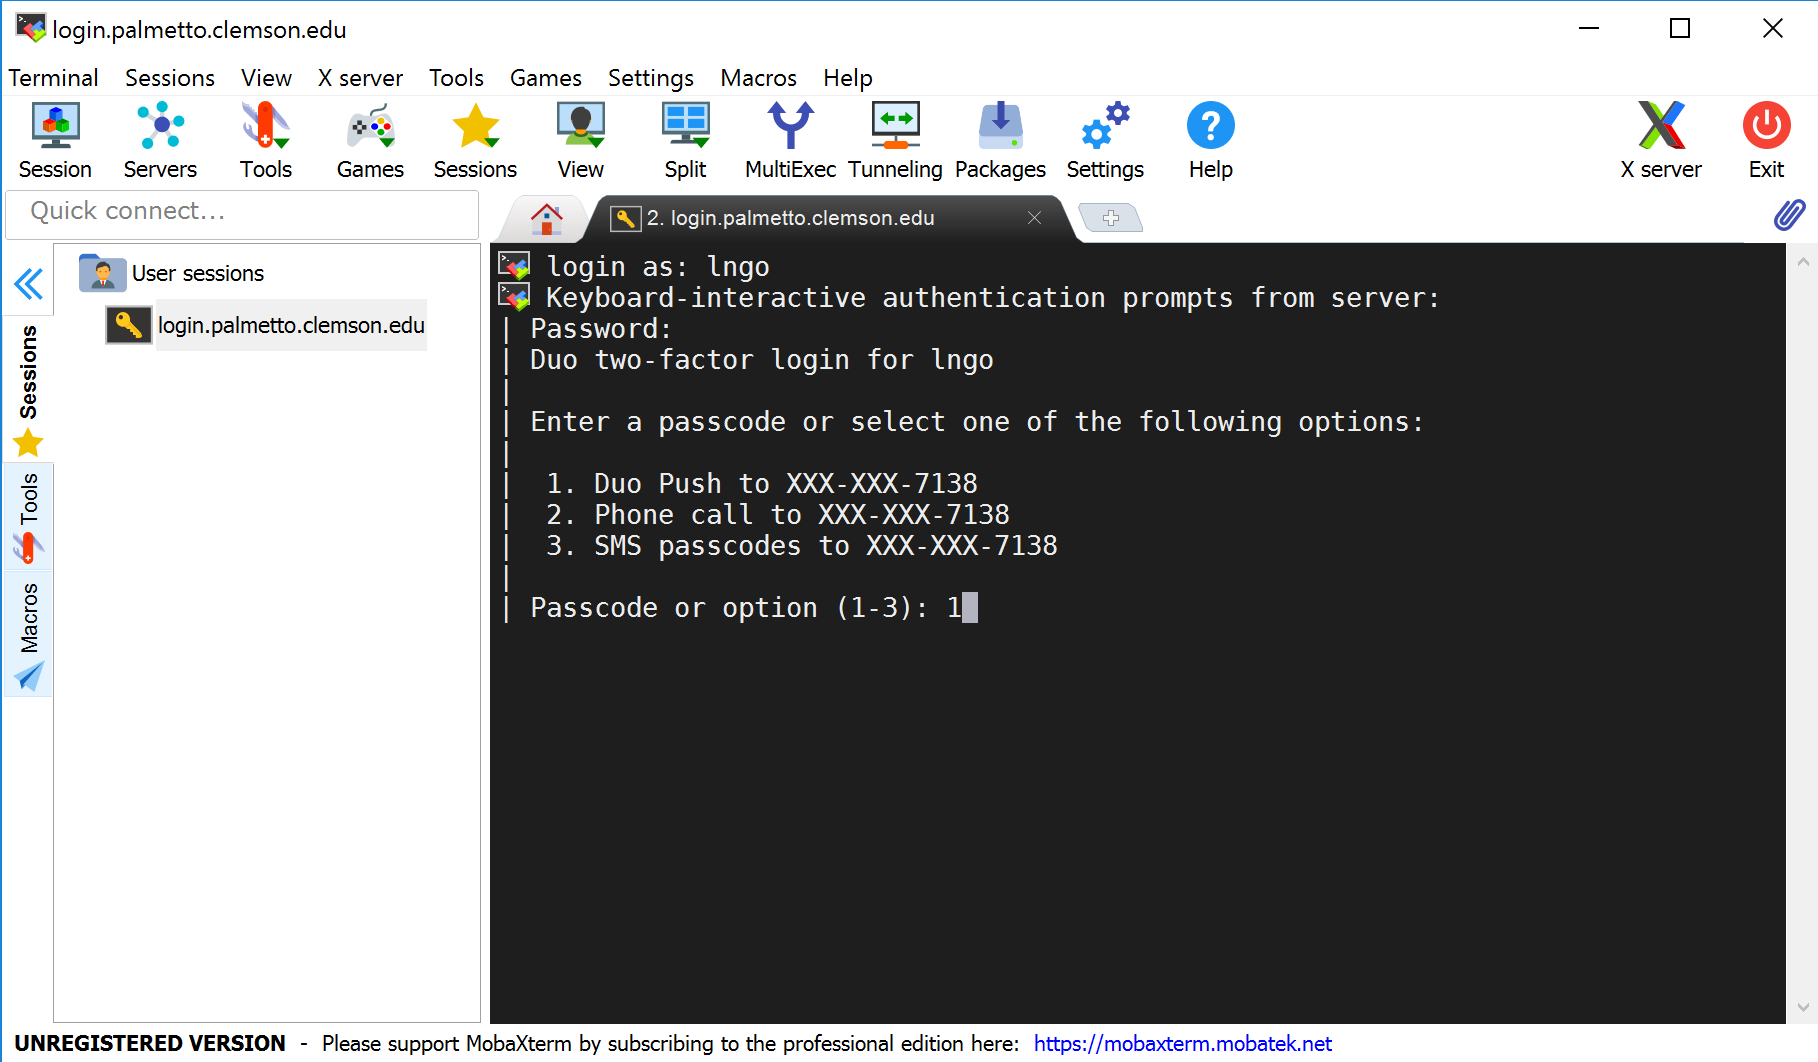
At this stage, for both Mac and Windows, you will be asked to enter your username and password, then DUO option.
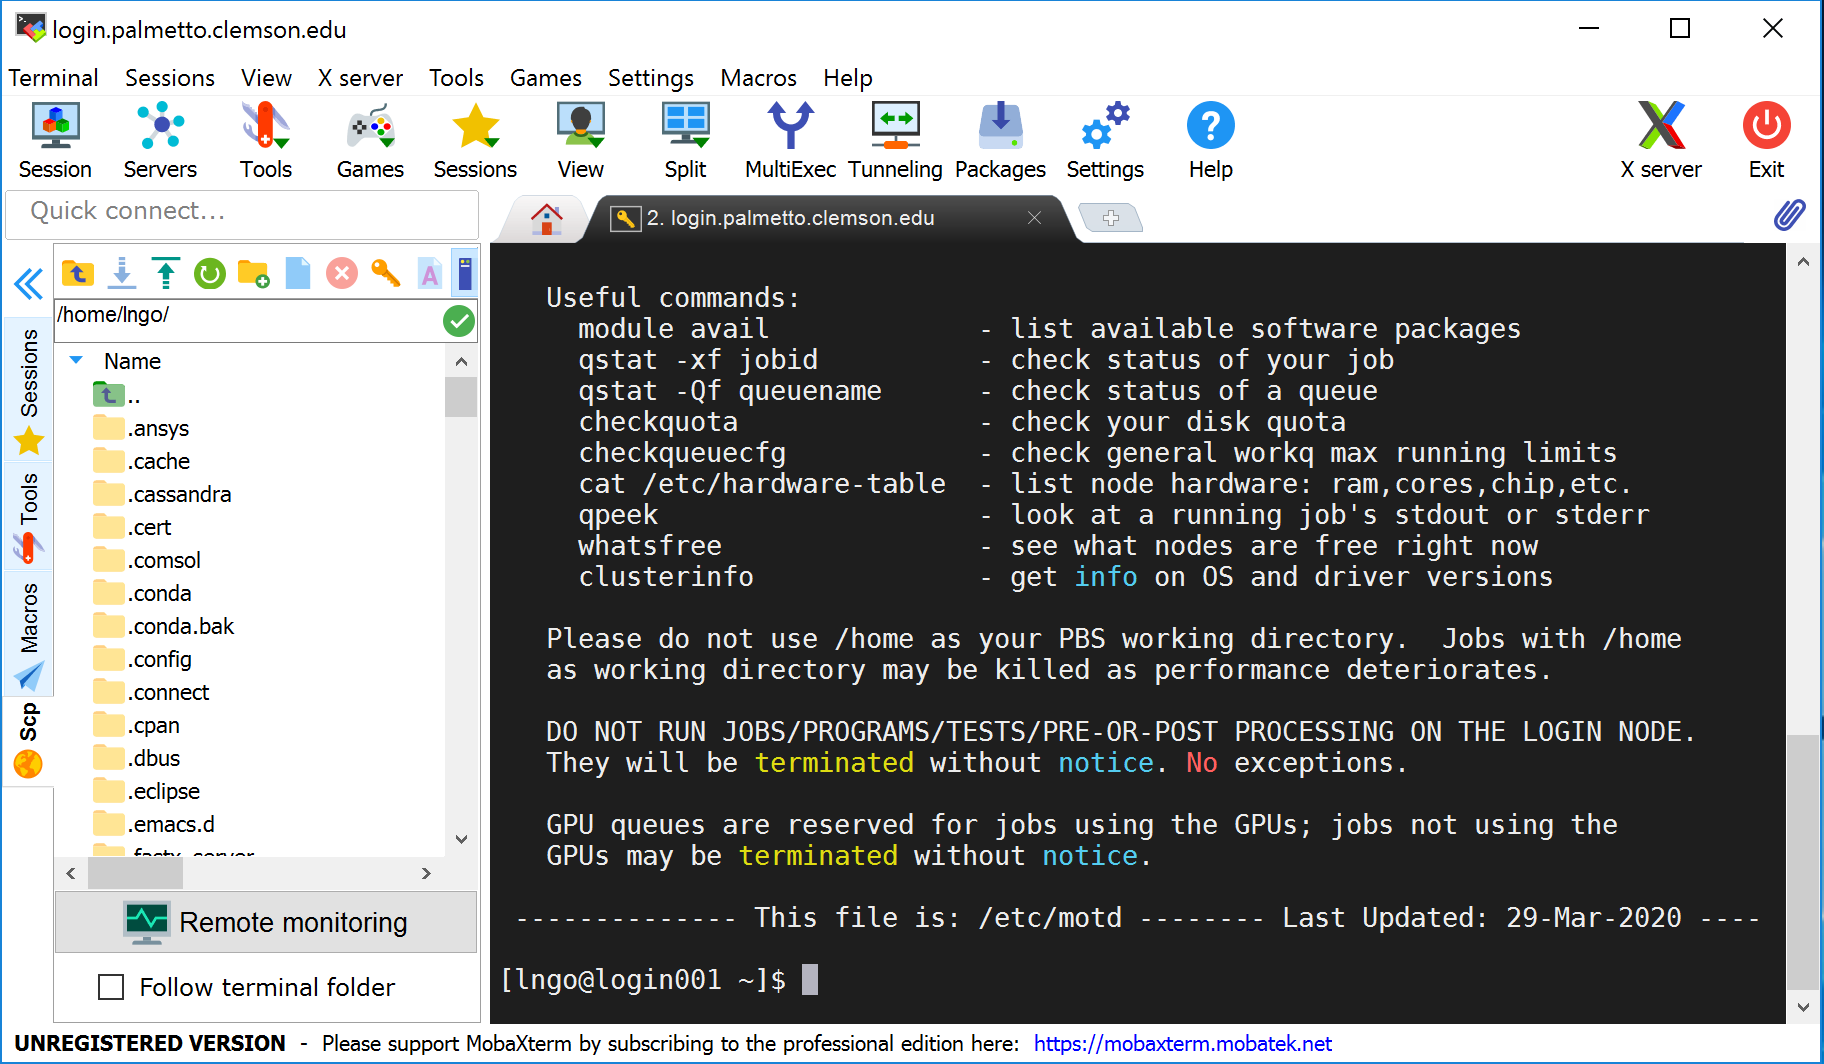
When logged in, you are presented with a welcome message and the following “prompt”:
[username@login001 ~]$
The prompt in a bash shell usually
contains a ($) sign,
and shows that the shell is waiting for input.
The prompt may also contain other information:
this prompt tells you your username and which node
you are connected to -
login001 is the “login” node.
It also tells you your current directory,
i.e., ~, which, as you will learn shortly,
is short for your home directory.
In the figure below, MobaXterm also gives you a GUI browser of your home directory on Palmetto. For Mac OS and Linux terminal, you will only have the command line interface to the right.
Key Points
Palmetto can be accessed by an SSh (secure shell) client
Windows user can use
MobaXTermapplicationMac users can use the
Terminalapplication
The structure of the Palmetto Cluster
Overview
Teaching: 15 min
Exercises: 0 minQuestions
What is the structure of the Palmetto Cluster?
Objectives
compute and login nodes, hardware table,
whatsfree
The computers that make up the Palmetto cluster are called nodes. Most of the nodes on Palmetto are compute nodes,
that can perform fast calculations on large amounts of data. There is also a special node called the login node; it runs the server,
which works like the interface
between the cluster
and the outside world. The people with Palmetto accounts can log into the server by running a client (such as ssh) on their local machines.
Our client program passes our login credentials to this server, and if we are allowed to log in, the server runs a shell for us.
Any commands that we enter into this shell are executed not by our own machines, but by the login node.
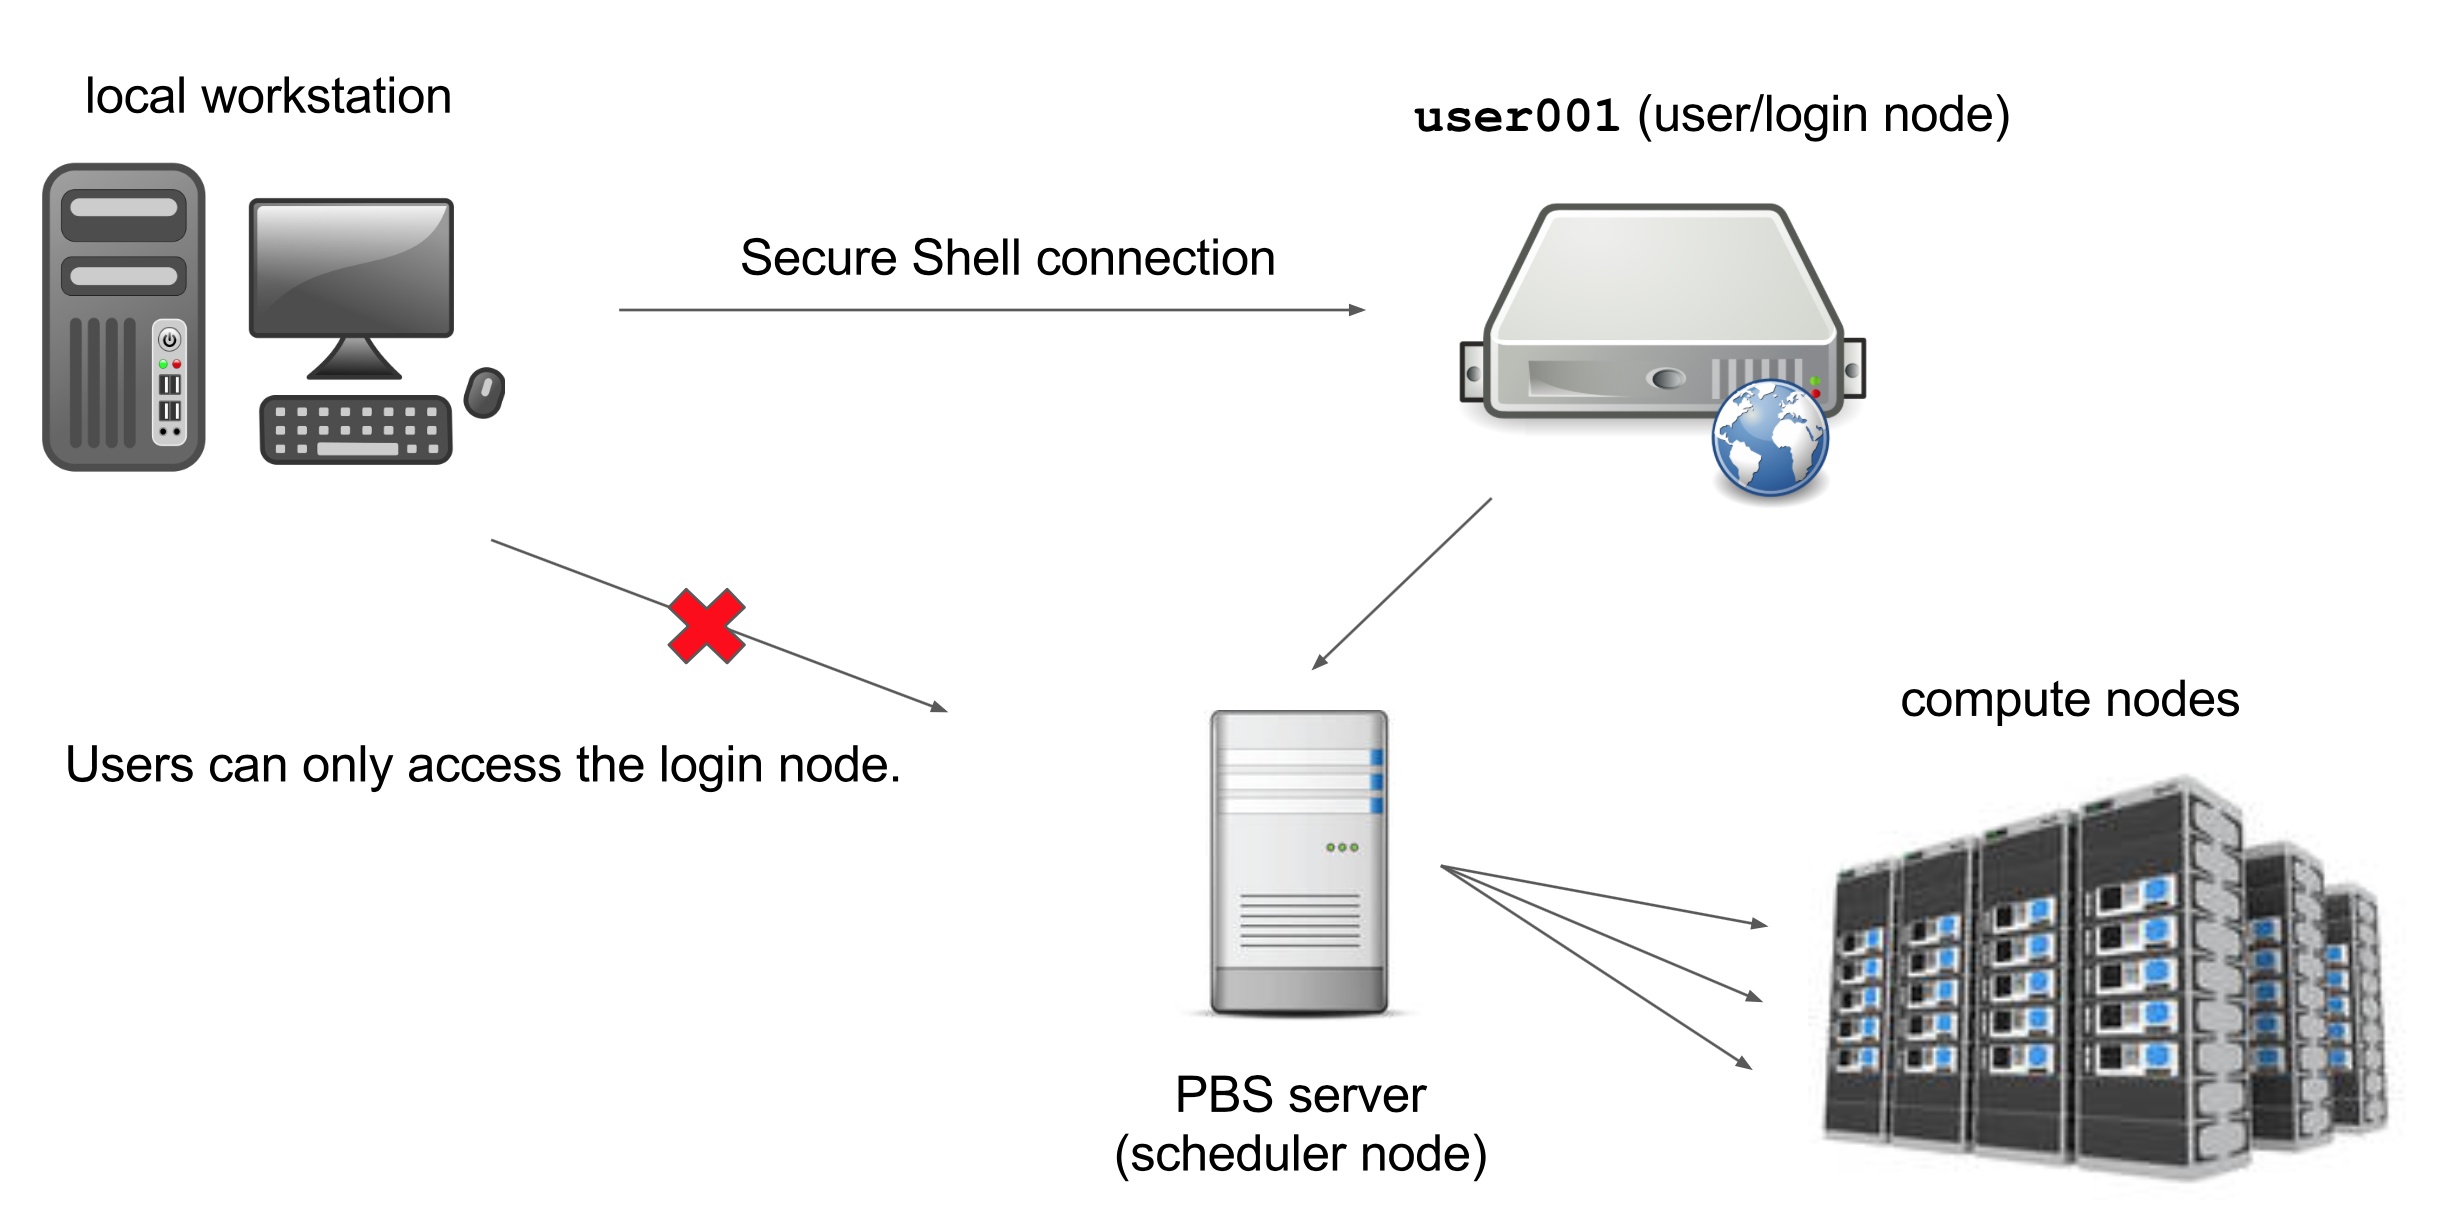
Another special node is the scheduler; Palmetto users can get from the login node to the compute nodes by submitting a request to the scheduler, and the scheduler will assign them to the most appropriate compute node. Palmetto also has a few so-called “service” nodes, which serve special purposes like transferring code and data to and from the cluster, and hosting web applications.
To see the hardware specifications of the compute nodes, please type
cat /etc/hardware-table
This will print out a text file with the hardware info. Please make sure you type exactly as shown; Linux is case-sensitive space-sensitive, and typo-sensitive. The output will look something like this:
PALMETTO HARDWARE TABLE      Last updated:  Jun 15 2020

PHASE COUNT  MAKE   MODEL    CHIP(0)                CORES  RAM(1)    /local_scratch   Interconnect     GPUs  SSD

 0      6    HP     DL580    Intel Xeon    7542       24   505 GB(2)    99 GB         1ge               0     0
 0      5    Dell   R820     Intel Xeon    E5-4640    32   750 GB(2)   740 GB(12)     10ge              0     0
 0      1    HP     DL560    Intel Xeon    E5-4627v4  40   1.5 TB(2)   881 GB         10ge              0     0
 0      1    Dell   R830     Intel Xeon    E5-4627v4  40   1.0 TB(2)   880 GB         10ge              0     0
 0      1    HPE    DL560    Intel Xeon    6138G      80   1.5 TB(2)   3.6 TB         10ge              0     0
 0      1    HPE    DL560    Intel Xeon    6148G      80   1.5 TB(2)   3.6 TB         10ge              0     0
 0      1    HPE    DL560    Intel Xeon    6148G      80   1.5 TB(2)   745 GB(12)     10ge              0     0

 1a   116    Dell   R610     Intel Xeon    E5520       8    31 GB      220 GB         1g                0     0
 1b    40    Dell   R610     Intel Xeon    E5645      12    92 GB      220 GB         1g                0     0
 2a    30    Dell   R620     Intel Xeon    E5-2660    16   375 GB      2.7 TB         1g                0     0
 2b   134    Dell   PE1950   Intel Xeon    E5410       8    15 GB       37 GB         1g                0     0
 3    224    Sun    X2200    AMD   Opteron 2356        8    15 GB      193 GB         1g                0     0
 4    323    IBM    DX340    Intel Xeon    E5410       8    15 GB      111 GB         1g                0     0
 5a   310    Sun    X6250    Intel Xeon    L5420       8    31 GB       31 GB         1g                0     0
 5b     9    Sun    X4150    Intel Xeon    E5410       8    31 GB       99 GB         1g                0     0
 5c    19    Dell   R510     Intel Xeon    E5640       8    22 GB        7 TB         1g                0     0
 5d    20    Dell   R520     Intel Xeon    E5-2450    12    46 GB      2.7 TB         1g                0     0
 6     66    HP     DL165    AMD   Opteron 6176       24    46 GB      193 GB         1g                0     0

 7a    42    HP     SL230    Intel Xeon    E5-2665    16    62 GB      240 GB         56g, fdr, 10ge    0     0
 7b    12    HP     SL250s   Intel Xeon    E5-2665    16    62 GB      240 GB         56g, fdr, 10ge    2(3)  0
 8a    71    HP     SL250s   Intel Xeon    E5-2665    16    62 GB      900 GB         56g, fdr, 10ge    2(4)  300 GB(7)
 8b    57    HP     SL250s   Intel Xeon    E5-2665    16    62 GB      420 GB         56g, fdr, 10ge    2(4)  0
 8c    88    Dell   PEC6220  Intel Xeon    E5-2665    16    62 GB      350 GB         56g, fdr, 10ge    0     0
 9     72    HP     SL250s   Intel Xeon    E5-2665    16   126 GB      420 GB         56g, fdr, 10ge    2(4)  0
10     80    HP     SL250s   Intel Xeon    E5-2670v2  20   126 GB      800 GB         56g, fdr, 10ge    2(4)  0
11a    40    HP     SL250s   Intel Xeon    E5-2670v2  20   126 GB      800 GB         56g, fdr, 10ge    2(6)  0
11b     4    HP     SL250s   Intel Xeon    E5-2670v2  20   126 GB      800 GB         56g, fdr, 10ge    0     0
12     30    Lenovo NX360M5  Intel Xeon    E5-2680v3  24   126 GB      800 GB         56g, fdr, 10ge    2(6)  0
13     24    Dell   C4130    Intel Xeon    E5-2680v3  24   126 GB      1.8 TB         56g, fdr, 10ge    2(6)  0
14     12    HPE    XL1X0R   Intel Xeon    E5-2680v3  24   126 GB      880 GB         56g, fdr, 10ge    2(6)  0
15     32    Dell   C4130    Intel Xeon    E5-2680v3  24   126 GB      1.8 TB         56g, fdr, 10ge    2(6)  0
16     40    Dell   C4130    Intel Xeon    E5-2680v4  28   126 GB      1.8 TB         56g, fdr, 10ge    2(8)  0
17     20    Dell   C4130    Intel Xeon    E5-2680v4  28   126 GB      1.8 TB         56g, fdr, 10ge    2(8)  0
18a     2    Dell   C4140    Intel Xeon    6148G      40   372 GB      1.9 TB(12)    100g, hdr, 10ge    4(9)  0
18b    65    Dell   R740     Intel Xeon    6148G      40   372 GB      1.8 TB        100g, hdr, 25ge    2(10) 0
18c    10    Dell   R740     Intel Xeon    6148G      40   748 GB      1.8 TB        100g, hdr, 25ge    2(10) 0
19a    28    Dell   R740     Intel Xeon    6248G      40   372 GB      1.8 TB        100g, hdr, 25ge    2(10) 0
19b     4    HPE    XL170    Intel Xeon    6252G      48   372 GB      1.8 TB         56g, fdr, 10ge    0     0

  *** PBS resource requests are always lowercase ***

(0) CHIP has 3 resources:   chip_manufacturer, chip_model, chip_type
(1) Leave 2 or 3GB for the operating system when requesting memory in PBS jobs
(2) Specify queue "bigmem" to access the large memory machines, only ncpus and mem are valid PBS resource requests
(3) 2 NVIDIA Tesla M2075 cards per node, use resource request "ngpus=[1|2]" and "gpu_model=m2075"
(4) 2 NVIDIA Tesla K20m cards per node, use resource request "ngpus=[1|2]" and "gpu_model=k20"
(5) 2 NVIDIA Tesla M2070-Q cards per node, use resource request "ngpus=[1|2]" and "gpu_model=m2070q"
(6) 2 NVIDIA Tesla K40m cards per node, use resource request "ngpus=[1|2]" and "gpu_model=k40"
(7) Use resource request "ssd=true" to request a chunk with SSD in location /ssd1, /ssd2, and /ssd3 (100GB max each)
(8) 2 NVIDIA Tesla P100 cards per node, use resource request "ngpus=[1|2]" and "gpu_model=p100"
(9) 4 NVIDIA Tesla V100 cards per node with NVLINK2, use resource request "ngpus=[1|2|3|4]" and "gpu_model=v100nv"
(10)2 NVIDIA Tesla V100 cards per node, use resource request "ngpus=[1|2]" and "gpu_model=v100"
(11)Phase18a nodes contain NVMe storage for /local_scratch.
(12)local_scratch is housed entirely on SSD
We have more than 2,000 compute nodes. They are grouped into phases; all nodes within a phase have the same hardware specifications. The compute nodes in Phase 0 have very large amount of RAM, up to 1.5 Tb. The nodes in phases 1 to 6 are connected to each other with 1g Ethernet connection; they have at least 8 CPUs and at least 15 Gb of RAM. Nodes in phases 7 and up are connected with InfiniBand connection, which is much faster than Ethernet. They are, on average, more powerful than the 1g nodes: they have at least 16 CPUs and at least 62 Gb of RAM. Most of them also have GPUs (videocards); they are typically not used for video processing, but rather for some computation-heavy procedures such as machine learning applications. About 600 compute nodes on Palmetto have GPUs. The InfiniBand nodes are more popular than the 1g nodes, so we have stricter limits on their use: one can use the 1g nodes for up to 168 hours at a time, whereas one can use an InfiniBand node for up to 72 hours.
To see which nodes are available at the moment, you can type
whatsfree
You will see something like this:
Mon Aug 03 2020 22:37:26

TOTAL NODES: 2102     NODES FREE: 2035     NODES OFFLINE: 14     NODES RESERVED: 0

PHASE 0    TOTAL =  16  FREE =  15  OFFLINE =   0  BIGMEM nodes: (6) 24cores/500GB, (5) 32cores/750GB, (3) 80cores/1.5TB, (1) 40cores/1.5TB, (1) 40cores/1TB, (1) 64cores/2TB
PHASE 1a   TOTAL = 117  FREE =  94  OFFLINE =   0  TYPE = Dell   R610    Intel Xeon  E5520,      8 cores,  31GB, 1g
PHASE 1b   TOTAL =  40  FREE =  40  OFFLINE =   0  TYPE = Dell   R610    Intel Xeon  E5645,     12 cores,  94GB, 1g
PHASE 2a   TOTAL =  30  FREE =  30  OFFLINE =   0  TYPE = Dell   R620    Intel Xeon  E5-2660    16 cores, 382GB, 1g
PHASE 2b   TOTAL = 162  FREE = 162  OFFLINE =   0  TYPE = Dell   PE1950  Intel Xeon  E5410,      8 cores,  15GB, 1g
PHASE 3    TOTAL = 224  FREE = 224  OFFLINE =   0  TYPE = Sun    X2200   AMD Opteron 2356,       8 cores,  15GB, 1g
PHASE 4    TOTAL = 319  FREE = 319  OFFLINE =   0  TYPE = IBM    DX340   Intel Xeon  E5410,      8 cores,  15GB, 1g
PHASE 5a   TOTAL = 308  FREE = 308  OFFLINE =   0  TYPE = Sun    X6250   Intel Xeon  L5420,      8 cores,  30GB, 1g
PHASE 5b   TOTAL =   9  FREE =   9  OFFLINE =   0  TYPE = Sun    X4150   Intel Xeon  E5410,      8 cores,  15GB, 1g
PHASE 5c   TOTAL =  34  FREE =  34  OFFLINE =   0  TYPE = Dell   R510    Intel Xeon  E5460,      8 cores,  23GB, 1g
PHASE 5d   TOTAL =  23  FREE =  23  OFFLINE =   0  TYPE = Dell   R520    Intel Xeon  E5-2450    12 cores,  46GB, 1g
PHASE 6    TOTAL =  65  FREE =  64  OFFLINE =   0  TYPE = HP     DL165   AMD Opteron 6176,      24 cores,  46GB, 1g
PHASE 7a   TOTAL =  42  FREE =  38  OFFLINE =   0  TYPE = HP     SL230   Intel Xeon  E5-2665,   16 cores,  62GB, FDR
PHASE 7b   TOTAL =  12  FREE =   0  OFFLINE =   0  TYPE = HP     SL250s  Intel Xeon  E5-2665,   16 cores,  62GB, FDR, M2075
PHASE 8a   TOTAL =  71  FREE =  61  OFFLINE =   0  TYPE = HP     SL250s  Intel Xeon  E5-2665,   16 cores,  62GB, FDR, K20, SSD
PHASE 8b   TOTAL =  57  FREE =  57  OFFLINE =   0  TYPE = HP     SL250s  Intel Xeon  E5-2665,   16 cores,  62GB, FDR, K20
PHASE 8c   TOTAL =  88  FREE =  78  OFFLINE =  10  TYPE = Dell   PEC6220 Intel Xeon  E5-2665,   16 cores,  62GB, 10ge
PHASE 9    TOTAL =  72  FREE =  69  OFFLINE =   0  TYPE = HP     SL250s  Intel Xeon  E5-2665,   16 cores, 125GB, FDR, K20, 10ge
PHASE 10   TOTAL =  80  FREE =  76  OFFLINE =   0  TYPE = HP     SL250s  Intel Xeon  E5-2670v2, 20 cores, 125GB, FDR, K20, 10ge
PHASE 11a  TOTAL =  40  FREE =  39  OFFLINE =   0  TYPE = HP     SL250s  Intel Xeon  E5-2670v2, 20 cores, 125GB, FDR, K40, 10ge
PHASE 11b  TOTAL =   4  FREE =   4  OFFLINE =   0  TYPE = HP     SL250s  Intel Xeon  E5-2670v2, 20 cores, 125GB, FDR, Phi, 10ge
PHASE 12   TOTAL =  30  FREE =  30  OFFLINE =   0  TYPE = Lenovo MX360M5 Intel Xeon  E5-2680v3, 24 cores, 125GB, FDR, K40, 10ge
PHASE 13   TOTAL =  24  FREE =  24  OFFLINE =   0  TYPE = Dell   C4130   Intel Xeon  E5-2680v3, 24 cores, 125GB, FDR, K40, 10ge
PHASE 14   TOTAL =  12  FREE =  12  OFFLINE =   0  TYPE = HP     XL190r  Intel Xeon  E5-2680v3, 24 cores, 125GB, FDR, K40, 10ge
PHASE 15   TOTAL =  32  FREE =  32  OFFLINE =   0  TYPE = Dell   C4130   Intel Xeon  E5-2680v3, 24 cores, 125GB, FDR, K40, 10ge
PHASE 16   TOTAL =  40  FREE =  37  OFFLINE =   0  TYPE = Dell   C4130   Intel Xeon  E5-2680v4, 28 cores, 125GB, FDR, P100, 10ge
PHASE 17   TOTAL =  20  FREE =  20  OFFLINE =   0  TYPE = Dell   C4130   Intel Xeon  E5-2680v4, 28 cores, 125GB, FDR, P100, 10ge
PHASE 18a  TOTAL =   2  FREE =   0  OFFLINE =   0  TYPE = Dell   C4140   Intel Xeon  6148G,     40 cores, 372GB, HDR, V100nv, 10ge
PHASE 18b  TOTAL =  65  FREE =  55  OFFLINE =   0  TYPE = Dell   R740    Intel Xeon  6148G,     40 cores, 372GB, HDR, V100, 25ge
PHASE 18c  TOTAL =  10  FREE =  10  OFFLINE =   0  TYPE = Dell   R740    Intel Xeon  6148G,     40 cores, 748GB, HDR, V100, 25ge
PHASE 19a  TOTAL =  28  FREE =  24  OFFLINE =   4  TYPE = Dell   R740    Intel Xeon  6248G,     40 cores, 372GB, HDR, V100, 25ge
PHASE 19b  TOTAL =   4  FREE =   3  OFFLINE =   0  TYPE = HPE    XL170   Intel Xeon  6252G,     48 cores, 372GB, 10ge
PHASE 20   TOTAL =  22  FREE =  22  OFFLINE =   0  TYPE = Dell   R740    Intel Xeon  6238R,     56 cores, 372GB, HDR, V100S, 25ge

 NOTE: Your job will land on the oldest phase that satisfies your PBS resource requests.
This table shows the amount of completely free nodes per each phase; a node which has, for example, 8 cores, but only 4 of them are used, would not be counted as “free”. So this table is a conservative estimate. Note that there are a lot more free nodes in the 1g phases, compared to the InfiniBand phases. It is a good idea to run whatsfree when you log into Palmetto, to get a picture of how busy the cluster is. This picture can change pretty drastically depending on the time of the day and the day of the week.
Key Points
Palmetto contains more than 2000 interconnected compute nodes
a phase is a group of compute nodes that have the same architecture (CPUs, RAM, GPUs)
a specialized login node runs the SSH server
Storage on Palmetto
Overview
Teaching: 15 min
Exercises: 0 minQuestions
How and where can I store my files?
Objectives
home directory, scratch space
Every Palmetto user gets 100 Gb of storage space; this storage is backed up at the end of every day, and the backup is kept for 42 days. So if you accidentally delete a file that was created more than a day ago, we might be able to restore it. This storage is called home directory.
To see how much space you have left in your home directory, please type:
checkquota
Since most of you are new users of Palmetto, you should be using very little storage at the moment.
When you log into Palmetto, you end up in your home directory. To see which directory you are in, type
pwd
…which stands for “print working directory”. It should give you something like
/home/<your Palmetto username>
100 Gb might be enough for some, but for people dealing with extensive amounts of data that would not be enough. We also offer the access to scratch space, which is about 2++ Petabytes in total. Scratch space is not backed up; files that haven’t been used for more than a month are automatically deleted (and cannot be restored). We strongly encourage people to use scratch space, but please be aware of its temporary nature. When you get anything that is worth keeping, please back it up, either in your home directory, or on your local machine.
Scratch space is divided into two directories: scratch1 (1.88 Petabytes) and scratch2 (188 Terabytes). scratch1 uses a faster system for more rapid file transfer, and is well suited for jobs with thousands of read/write requests. scratch2 is better suited for read/write jobs that are performed in parallel.
To go to a scratch directory, or to any directory on Palmetto, use the cd (“change directory”) command:
cd /scratch1/<your Palmetto username>
or:
cd /scratch2/<your Palmetto username>
To go to your home directory, you can do
cd /home/<your Palmetto username>
There is also a shortcut; to go to your home directory, you can simply type
cd
Here, I will not go into details about Linux commands. Some of you have taken our Linux workshop. There are many online tutorials, my favourite is this one. Please spend some time getting familiar with going between the directories, as well as with copying, moving, and deleting files.
We offer storage space on Palmetto for sale, with the price of $150 per 1 terabyte. This storage is backed up just like your home directory.
Key Points
users get 100 Gb of backed-up storage in their home directories
they also have access to more than 2 Pb of scratch storage
scratch storage is not backed up, and files left unused for 1 month are deleted
Transferring files to and from Palmetto
Overview
Teaching: 15 min
Exercises: 0 minQuestions
How can I transfer data between Palmetto and my local machine?
Objectives
WinSCP, FileZilla
CyberDuck
There are many ways to transfer files between your local computer and Palmetto. One piece of software that works for both Mac and Windows machines is called CyberDuck. You can download it here.
After installation, click on “Open Connection”. A new window will pop out:
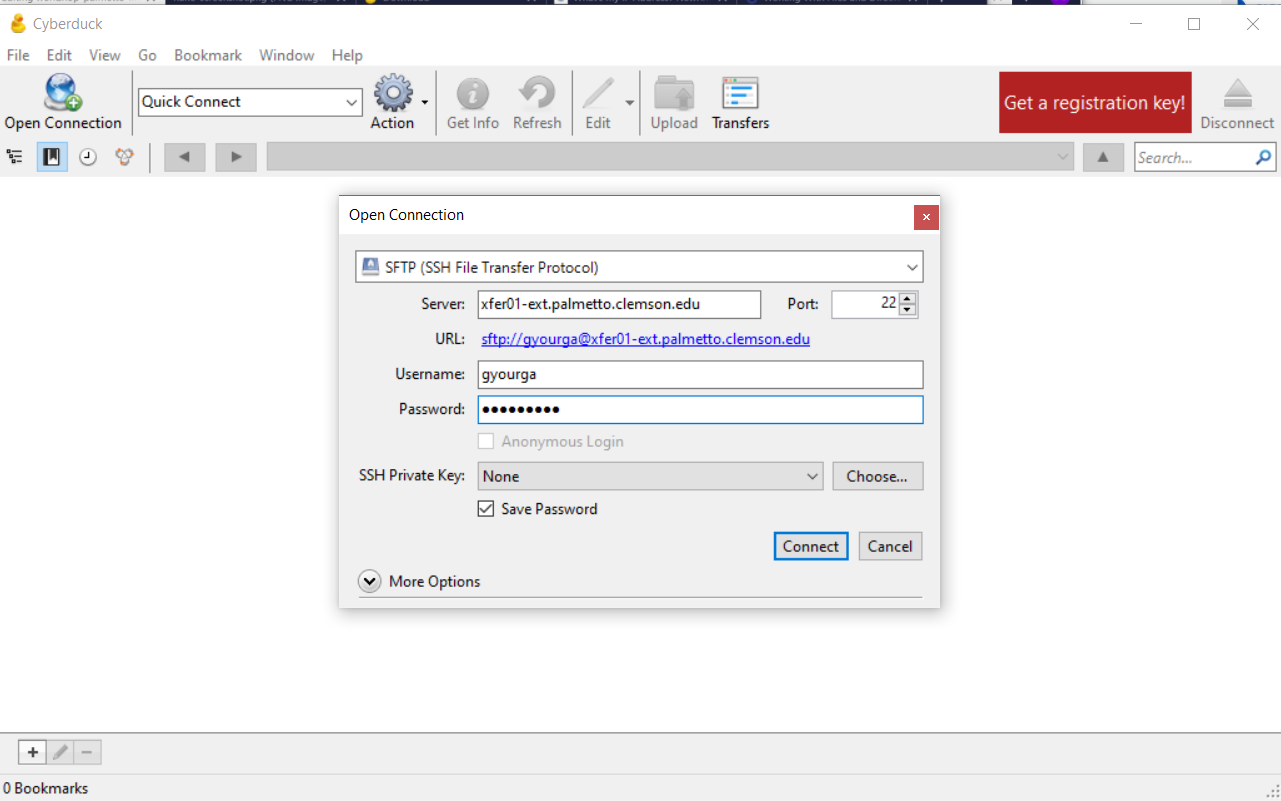
Let’s configure the connection:
- in the drop-down menu on top, select “SFTP” instead of the default “FTP”;
- in the “Server”, please specify
xfer01-ext.palmetto.clemson.edu; - make sure that Port is set to 22;
- specify your Palmetto username and password.
Then, click on “Connect”. Another window will pop out asking you to do two-factor verification:
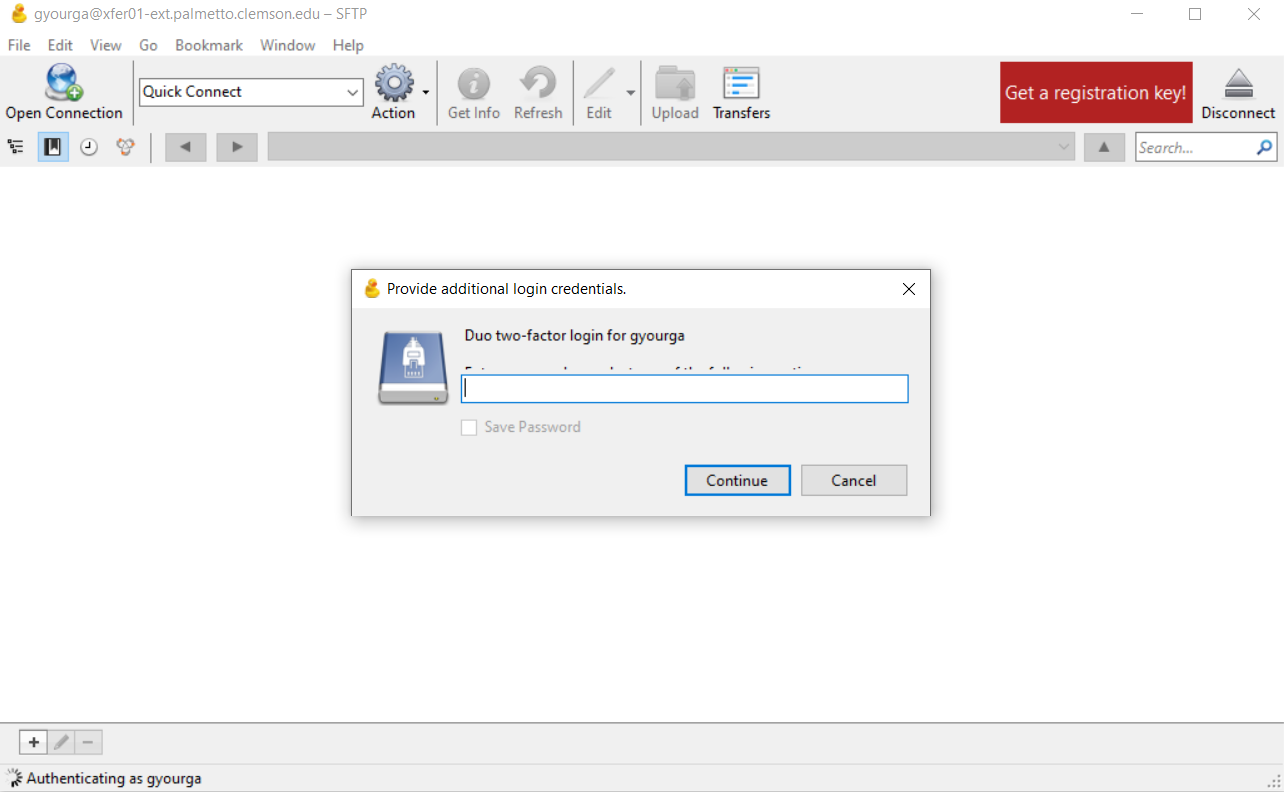
Type “1” (the number one) or the word “push” if you want to get a DUO push notification. After two-factor verification, a yet another new window will pop up, which will contain the contents of your Palmetto home directory (if this is your first time using Palmetto, it will be empty). You can go to any other folder on Palmetto by changing the path (e.g., /scratch1/username). You can upload files by clicking the “Upload” button, and download files by right-clicking them and selecting “Download”.
MobaXTerm (Windows users only)
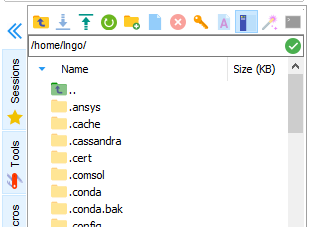
For small file transfers, the Windows users can use the built-in function in MobaXTerm. On the left side of the MobaXTerm window, you will see the browser of your Palmetto directory. By default, it points to your home directory: /home/<your Palmetto username>. You can point it to any other folder that you have access to, for example, to /scratch1/<your Palmetto username>. To upload files to Palmetto, use the UP arrow ↑, and to download files from Palmetto, use the DOWN arrow ↓.
command line (Mac and Linux users)
Another option for advanced Mac and Linux users is to use the scp command from the terminal. Open a new terminal, but don’t connect to Palmetto. The scp command works like this:
scp <path_to_source> username@xfer01-ext.palmetto.clemson.edu:<path_to_destination>
For example, here is the scp command to copy a file from the current directory on my local machine to my home directory on Palmetto (gyourga is my Palmetto username:
scp myfile.txt gyourga@xfer01-ext.palmetto.clemson.edu:/home/gyourga/
… and to do the same in reverse, i.e., copy from Palmetto to my local machine:
scp gyourga@xfer01-ext.palmetto.clemson.edu:/home/gyourga/myfile.txt .
The . represents the working directory on the local machine.
To copy entire folders, include the -r switch:
scp -r myfolder gyourga@xfer01-ext.palmetto.clemson.edu:/home/gyourga/
transferring large amounts of data
If you need to transfer several gigabytes of data, and you find WinSCP / FileZilla too slow, you can use Globus. The interface is not as intuitive, but the file transfer speeds are much higher. The guide to using Globus is on our website.
Key Points
Windows users can use WinSCP for file transfer
Mac users can use FileZilla
Running an interactive job on Palmetto
Overview
Teaching: 15 min
Exercises: 0 minQuestions
How do I request and interact with a compute node?
Objectives
qsub,pbsnodes, modules
Now, we arrive at the most important part of today’s workshop: getting on the compute nodes. Compute nodes are the real power of Palmetto. Let’s see which of the compute nodes are available at the moment:
whatsfree
We can see that the cluster is quite busy, but there is a fair amount of compute nodes that are available for us. Now, let’s request one compute node. Please type the following (or paste from the website into your SSH terminal):
qsub -I -l select=1:ncpus=4:mem=10gb:interconnect=1g,walltime=2:00:00
It is very important not to make typos, use spaces and upper/lowercases exactly as shown, and use the proper punctuation (note the : between ncpus and mem, and the , before walltime). If you make a mistake, nothing wrong will happen, but the scheduler won’t understand your request.
Now, let’s carefully go through the request:
qsubmeans that we are asking the scheduler to grant us access to a compute node;-Imeans it’s an interactive job (we’ll talk about it in a bit);-lis the list of resource requirements we are asking for;select=1means we are asking for one compute node;ncpus=4means that we only need four CPUs on the node (since all Palmetto compute nodes have at least 8 CPUs, we might share the compute node with other users, but it’s OK because users who use the same node do not interfere with each other);mem=10gbmeans that we are asking for 10 Gb of RAM (you shouldn’t ask for less than 8 Gb); again, memory is specific to the user, and not shared between different users who use the same node);interconnect=1gis the type of interconnect (the allowed types are1g,fdrandhdr). If you look at the output ofwhatsfreeandcat /etc/hardware-table, you will see the different CPU/RAM configurations that are available for these three types of interconnect. Typically, but not always,1gnodes have less RAM and a smaller number of CPUs thanfdrandhdr(with thehdrnodes being the most powerful interms of RAM and CPUs).- finally,
walltime=2:00:00means that we are asking to use the node for 2 hours; after two hours we will be logged off the compute node if we haven’t already disconnected.
This is actually a very modest request, and the scheduler should grant it right away. Sometimes, when we are asking for much substantial amount of resources (for example, 20 nodes with 40 cores and 370 Gb of RAM), the scheduler cannot satisfy our request, and will put us into the queue so we will have to wait until the node becomes available.
Once the request is granted, you will see something like that:
qsub (Warning): Interactive jobs will be treated as not rerunnable
qsub: waiting for job 631266.pbs02 to start
qsub: job 631266.pbs02 ready

(base) [gyourga@node0193 ~]$
Please note two important things. First, our prompt changes from login001 no nodeXXXX, where XXXX is some four-digit number. This is the number of the node that we got (in our case, 0193). The second one is the job ID, which is 631266. We can see the information about the compute node by using the pbsnodes command:
pbsnodes node0193
Here is the information about the node that I was assigned to (node0102):
(base) [gyourga@node0193 ~]$ pbsnodes node0193
node0102
     Mom = node0193.palmetto.clemson.edu
     ntype = PBS
     state = job-busy
     pcpus = 8
     Priority = 1
     jobs = 626489.pbs02/0, 626489.pbs02/1, 626489.pbs02/2, 626489.pbs02/3, 631266.pbs02/4, 631266.pbs02/5, 631266.pbs02/6, 631266.pbs02/7
     resources_available.arch = linux
     resources_available.chip_manufacturer = intel
     resources_available.chip_model = xeon
     resources_available.chip_type = e5520
     resources_available.host = node0193
     resources_available.hpmem = 0b
     resources_available.interconnect = 1g
     resources_available.make = dell
     resources_available.manufacturer = dell
     resources_available.mem = 31922mb
     resources_available.model = r610
     resources_available.ncpus = 8
     resources_available.ngpus = 0
     resources_available.node_make = dell
     resources_available.node_manufacturer = dell
     resources_available.node_model = r610
     resources_available.nphis = 0
     resources_available.phase = 1a
     resources_available.qcat = c1_workq_qcat, c1_solo_qcat, osg_qcat, phase01a_qcat, mx_qcat
     resources_available.ssd = False
     resources_available.vmem = 32882mb
     resources_available.vnode = node0193
     resources_assigned.accelerator_memory = 0kb
     resources_assigned.hbmem = 0kb
     resources_assigned.mem = 18874368kb
     resources_assigned.naccelerators = 0
     resources_assigned.ncpus = 8
     resources_assigned.ngpus = 0
     resources_assigned.nphis = 0
     resources_assigned.vmem = 0kb
     resv_enable = True
     sharing = default_shared
     last_state_change_time = Mon Oct 12 13:15:56 2020
     last_used_time = Thu Oct  1 01:31:30 2020
You can see that the node has 8 CPUs, no GPUs, belongs to phase 1a, and at the moment runs 8 jobs. One of these jobs is mine. When I submitted qsub request, the scheduler told me that my job ID is 631120. The pbsnodes command gives us the list of jobs that are currently running on the compute node, and, happily, I see my job on that list. It appears four times, because I have requested four CPUs.
To exit the compute node, type:
exit
This will bring you back to the login node. See how your prompt has changed to login001. It is important to notice that you have to be on a login node to request a compute node. One you are on the compute node, and you want to go to another compute node, you have to exit first.
For some jobs, you might want to get a GPU, or perhaps two GPUs. For such requests, the qsub command needs to specify the number of GPUs (one or two) and the type of GPUs (which you can get from cat /etc/hardware-table). For example, let’s request a NVIDIA Tesla K40 (these nodes are on the fdr interconnect so we have to specify that as well):
qsub -I -l select=1:ncpus=4:mem=10gb:ngpus=1:gpu_model=k40:interconnect=fdr,walltime=2:00:00
Regarding the interconnect, the three examples below ask for the same combination of CPUs and RAM but with diffrent interconnect types:
qsub -I -l select=1:ncpus=4:mem=10gb:interconnect=1g,walltime=2:00:00qsub -I -l select=1:ncpus=4:mem=10gb:interconnect=fdr,walltime=2:00:00qsub -I -l select=1:ncpus=4:mem=10gb:interconnect=hdr,walltime=2:00:00
If the scheduler receives a request it cannot satisfy, it will complain and not assign you to a compute node (you will stay on the login node). For example, if you ask for 40 CPUs and interconnect=1g.
It is possible to ask for several compute nodes at a time, for example select=4 will give you 4 compute nodes. Some programs, such as LAMMPS or NAMD, work a lot faster if you ask for several nodes. This is an advanced topic and we will not discuss it here, but you can find some examples on our website.
It is very important to remember that you shouldn’t run computations on the login node, because the login node is shared between everyone who logs into Palmetto, so your computations will interfere with other people’s login processes. However, once you are on a compute node, you can run some computations, because each user gets their own CPUs and RAM so there is no interference. If you are on the login node, let’s get on the compute node:
qsub -I -l select=1:ncpus=4:mem=10gb:interconnect=1g,walltime=2:00:00
We have a lot of software installed on Palmetto, but most of it is organized into modules, which need to be loaded. For example, we have many versions of Matlab installed on Palmetto, but if you type
matlab
you will get an error:
-bash: matlab: command not found
In order to use Matlab, as well as most other software installed on Palmetto, you need to load the Matlab module. To see which modules are available on Palmetto, please type
module avail
Hit SPACE several times to get to the end of the module list. This is a very long list, and you can see that there is a lot of software installed for you. If you want to see which versions of Matlab are installed, you can type
module avail matlab
-------------------------------------------------------------- /software/AltModFiles ---------------------------------------------------------------
   matlab/MUSC2018b    matlab/2018b    matlab/2019b    matlab/2020a (D)

  Where:
   D:  Default Module

Use "module spider" to find all possible modules and extensions.
Use "module keyword key1 key2 ..." to search for all possible modules matching any of the "keys".
Let’s say you want to use Matlab 2020. To load the module, you will need to specify its full name:
module load matlab/2020a
To see the list of modules currently loaded, you can type
module list
If the Matlab module was loaded correctly, you should see it in the module list. In order to start command-line Matlab, you can type
matlab
To exit Matlab, please type exit. To unload a module, you an use module unload matlab/2020a command. To unload all the modules, please type
module purge
Now, if you do module list, the list should be empty. Now, let’s start R. To see which versions of R are available, type
module avail r
This will give you a list of all modules which have the letter “r” in them (module avail is not very sophisticated). Let’s see what happens when you load the R 4.0.2 module:
module load r/4.0.2-gcc/8.3.1
module list
Currently Loaded Modules:
  1) tcl/8.6.8-gcc/8.3.1   2) openjdk/11.0.2-gcc/8.3.1   3) libxml2/2.9.10-gcc/8.3.1   4) libpng/1.6.37-gcc/8.3.1   5) r/4.0.2-gcc/8.3.1
R depends on other software to run, so we have configured the R module in a way that when you load it, it automatically loads other modules that it depends on.
Key Points
whatsfreeshows the current Palmetto usage
qsubsends a request for a compute node to the schedulersoftware available on Palmetto is organized into modules according to version
modules need to be loaded before use
Running a batch job
Overview
Teaching: 15 min
Exercises: 0 minQuestions
How do I run my computations on a compute node on the background?
Objectives
PBS scripts,
qstat,checkqueuecfg,nano
Interactive jobs are great if you need to do something quick, or perhaps visualize some data. If you have some code which runs for seven hours, interactive jobs are not a great idea. Please keep in mind that an interactive job gets killed if you close the SSH connection. So for example, you connect to Palmetto from your laptop, start an interactive job, but then your laptop runs out of battery power and you can’t find your charger. SSH client quits, and your interactive job is killed.
If you have some truly serious, multi-hour computation project (and that’s what Palmetto is really good for), a better idea is to run it on the background. This is called a batch job. You submit it in a fashion which is conceptually similar to an interactive job, but then it runs on the compute node on the background until it’s over. If it needs to take two days, it takes two days. You can quit the SSH client or close your laptop, it won’t affect the batch job.
To submit a batch job, we usually create a separate file called a PBS script. This file asks the scheduler for specific resources, and then specifies the actions that will be done once we get on a compute node.
Let us go through an example. We will use bath mode to compute the first eigenvalue of a large matrix. We will create two scripts: a Matlab script which does the computation, and a PBS script which will execute the Matlab script on a compute node in batch mode.
Palmetto has a simple text editor which is called nano. It doesn’t offer any fancy formatting, but it suffices for ceating and editing simple texts. Let’s go to our home directory and create the Matlab script:
cd
nano bigmatrix.m
This will open the nano text editor:
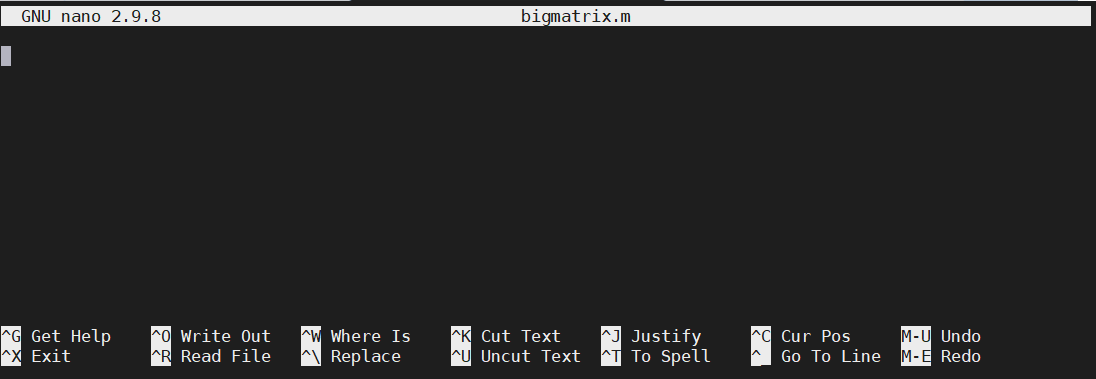
Inside the editor, type this:
a = randn (5000, 5000);
[v,d] = eig (a);
fprintf ('first eigenvalue = %.5f\n', d(1,1));
Instead of typing, you can copy the text from the Web browser and paste it into nano. Windows users can paste with Shift+Ins (or by right-clicking the mouse). Mac users can paste with Cmd+V. At the end, your screen should look like this:
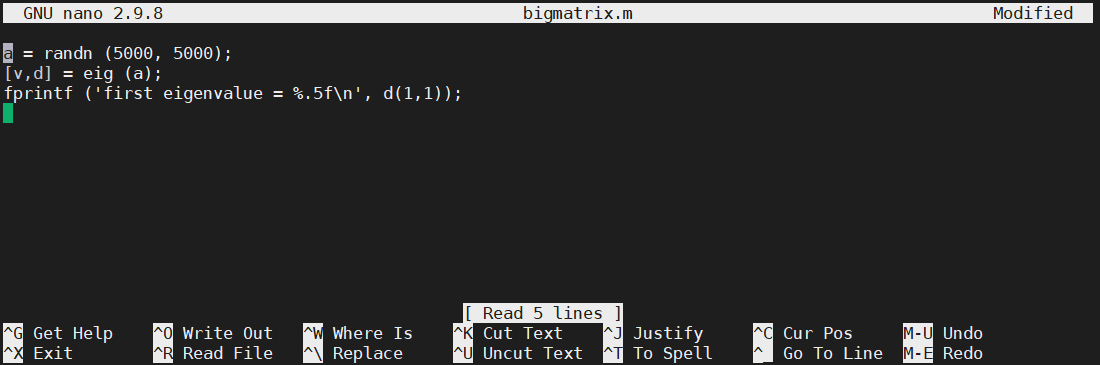
To save it, press Ctrl+O, and hit enter. To exit the editor, press Ctrl+X. To make sure the text is saved properly, print it on screen using the cat command:
cat bigmatrix.m
Now, let’s create the PBS script:
nano bigmatrix.sh
Inside the nano text editor, type this (or paste from the Web browser):
#!/bin/bash
#
#PBS -N bigmatrix
#PBS -l select=1:ncpus=10:mem=10gb:interconnect=1g
#PBS -l walltime=0:30:00
#PBS -o output.txt
#PBS -j oe

cd $HOME
module load matlab/2020a
matlab -r "bigmatrix"
Let’s go through the script, line by line. The first cryptic line says that it’s a script that is executed by the Linux shell. The next line is empty, followed by five lines that are the instructions to the scheduler (they start with #PBS):
-Nspecifiies the name of the job (could be anything, I called itbigmatrixfor the sake of consistency)- the first
-lline is the specification of resources: one node, ten CPUs, ten Gb of RAM, 1g interconnect - the second
-lline is the amount of walltime (thirty minutes); -ospecifies the name of the output file where the Matlab output will be printed;-j oemeans “join output and error”, which is, if any errors happen, they will be written intooutput.txt.
The rest is the instructions what to do once we get on the compute node that satisfies the request we provided in -l: go to the home directory, load the Matlab module, and execute the Matlab script called bigmatrix.m that we have created. Save the PBS script and exit nano (Ctrl+O, ENTER, Ctrl+X).
A very common question is how much walltime we should ask for. It’s a tricky question beause there is no way of knowing how much time you will need until you actually try it. My rule of thumb is: make a rough guess, and ask for twice as much. The bigmatrix.m script takes at most 15 minutes (usually it runs under five minutes), so I ask for half an hour.
Now, let’s submit our batch job!
qsub bigmatrix.sh
We use the same command qsub that we have previously used for an interactive job, but now it’s much simpler, because all the hard work went into creating the PBS shell script bigmatrix.sh and qsub reads all the necessary information from there. If the submission was successful, it will give you the job ID, for example:
632585.pbs02
We can monitor the job’s progress with the qstat command. This is an example to list all jobs that are currently executed by you:
qstat -u <your Palmetto username>
You should see something like this:
pbs02:
                                                            Req'd  Req'd   Elap
Job ID          Username Queue    Jobname    SessID NDS TSK Memory Time  S Time
--------------- -------- -------- ---------- ------ --- --- ------ ----- - -----
632585.pbs02    gyourga  c1_sing* bigmatrix  24385*   1  10   10gb 00:30 R 00:00
You see the job ID, your Palmetto username, the name of the queue (more on that later), the name of the job (bigmatrix), the resources requested (1 node, 10 CPUs, 10 gb of RAM, half an hour of walltime). The letter R means that the job is running (Q means “queued”, and F means “finished”), and then it shows for how long it’s been running (it basically just started).
Wait a little bit and do qstat again (you can hit the UP arrow to show the previous command). Elap time should now be a bit longer. The script should take five minutes or so to execute. If you enter qstat -u <your Palmetto username> and the list is empty, then congratulations, we are done!
If everything went well, you should now see the file output.txt. Let’s print it on screen:
cat output.txt
MATLAB is selecting SOFTWARE OPENGL rendering.

                            < M A T L A B (R) >
                  Copyright 1984-2020 The MathWorks, Inc.
              R2020a Update 1 (9.8.0.1359463) 64-bit (glnxa64)
                               April 9, 2020


To get started, type doc.
For product information, visit www.mathworks.com.

>> >> >> first eigenvalue = -64.79945
Your first eigenvalue might be different because it’s a random matrix.
Another way to use qstat is to list the information about a particular job. Here, instead of -u, we use the -xf option, followed by the Job ID:
qstat -xf 632585
This will give you a lot of information about the jib, which is really useful for debugging. If you have a problem and you need our help, it is very helpful to us if you provide the job ID so we can do qstat -xf on it and get the job details.
How many jobs can you run at the same time? It depends on how much resources you ask for. If each job asks for a small amount of resources, you can do a large amount of jobs simultaneously. If each job needs a large amount of resources, only a few of them can be running simultaneously, and the rest of them will be waiting in the queue until the jobs that are running are completed. This is a way to ensure that Palmetto is used fairly.
These limits of the number of simultaneous jobs is not carved in stone, but it changes depending on how much Palmetto is used at the moment. To see the current queue configuration, you can execute this command (note that it only works on the login node):
checkqueuecfg
You will see something like this:
1G QUEUES     min_cores_per_job  max_cores_per_job   max_mem_per_queue  max_jobs_per_queue   max_walltime
c1_solo                       1                  1              5000gb                 500      168:00:00
c1_single                     2                 24             36000gb                 300      168:00:00
c1_tiny                      25                128             25600gb                  25      168:00:00
c1_small                    129                512              8192gb                   2      168:00:00
c1_medium                   513               2048             32768gb                   2      168:00:00
c1_large                   2049               4096                 0gb                   0      168:00:00

IB QUEUES     min_cores_per_job  max_cores_per_job   max_mem_per_queue  max_jobs_per_queue   max_walltime
c2_single                     1                 40              6000gb                  15       72:00:00
c2_tiny                      41                200             16000gb                   5       72:00:00
c2_small                    201                512              6144gb                   1       72:00:00
c2_medium                   513               2048             16384gb                   1       72:00:00
c2_large                   2049               4096                 0gb                   0       72:00:00

GPU QUEUES     min_gpus_per_job   max_gpus_per_job  min_cores_per_job  max_cores_per_job   max_mem_per_queue  max_jobs_per_queue   max_walltime
gpu_small                     1                  4                  1                 96              4320gb                  15       72:00:00
gpu_medium                    5                 16                  1                256              6144gb                   4       72:00:00
gpu_large                    17                256                  1               2048             12288gb                   2       72:00:00

VGPU QUEUES   min_vgpus_per_job  max_vgpus_per_job  min_cores_per_job  max_cores_per_job   max_mem_per_queue  max_jobs_per_queue   max_walltime
vgpu_small                    1                  1                  1                  4               320gb                  10       72:00:00

SMP QUEUE     min_cores  max_cores   max_jobs   max_walltime
bigmem                1         80          5      168:00:00


   'max_mem' is the maximum amount of memory all your jobs in this queue can
   consume at any one time.  For example, if the max_mem for the solo queue
   is 4000gb, and your solo jobs each need 10gb, then you can run a
   maximum number of 4000/10 = 400 jobs in the solo queue, even though the
   current max_jobs setting for the solo queue may be set higher than 400.


   NOTE:  Although you may be within the limits for a queue, there may not
          be any resources of the type you are requesting currently available.
One thing to note is that 1g nodes have maximum walltime of 168 hours (seven days), and InfiniBand (hdr and fdr) nodes have maximum walltime of 72 hours (three days). Since the GPUs are only installed on the InfiniBand nodes, any job that asks for a GPU will also be subject to 72-hour limit. The maximum number of simultaneous jobs really depends on how much CPUs and memory you are asking; for example, for 1 node, 10 CPUs and 10 Gb of RAM (what we asked for in our bigmatrix job), we can run 300 jobs on 1g nodes (queue name c1_single), but only 15 jobs on InfiniBand nodes (queue name c2_single).
Key Points
batch jobs don’t require interaction with the user and run on the compute nodes on the background
to submit a batch job, users need to provide a PBS script which is passed to the scheduler
jobs are assigned to queues, according to the amount of requested resources
different queues have different limits on the walltime and the number of parallel jobs