1. Setup prior to the workshop
1.1 SMU M2 account request
In SMU OIT RDSS Kaggle club, we will be using SMU M2 as a platform for all of the work.
Therefore, you must have a FREE M2 account prior to setting up your workflow.
To request for M2 account, you need to send email to help@smu.edu with HPC on the subject line to request for M2 account, you can put Eric Godat (egodat@smu.edu) or Tue Vu (tuev@smu.edu) as sponsor for your M2 account. The account is available for 1 year and renewable upon request
1.2 Login to your M2 account using one of the following method:
- Via hpc.smu.edu => Shell Access (Preferable method)

- Via MacOS Terminal:
ssh yourusername@m2.smu.edu
- Via Windows MobaXTerm:
Open Sessions\New Sessions\SSH
Remote host: m2.smu.edu
Specify username: your M2 account
Advanced SSH Settings\SSH browser type: SCP (enhanced speed)
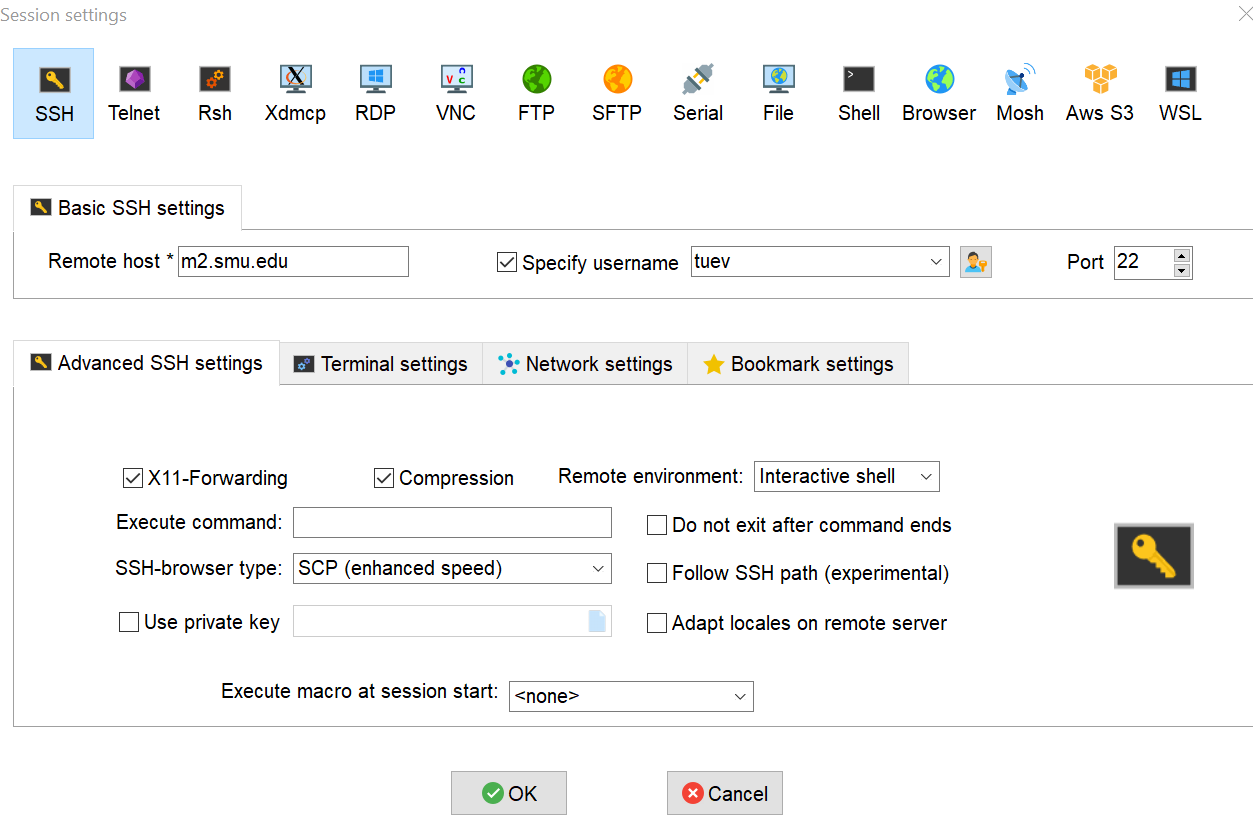
Once done, you will be placed in the login node:
[yourM2username@login01 ~]$
1.3 Request a compute node
You should not use login node to do computation. Instead you can request from any of M2 compute node using one of the following command:
Example: requesting 1 node with 10 cpus, 16gb of memory for 12 hours in queue name standard-mem-s
$ srun -N1 -c10 --mem=16gb -p standard-mem-s --time=12:00:00 --pty $SHELL
Example: requesting 1 node with 10 cpus, 16gb of memory for 12 hours using Tesla P100 GPU in queue name gpgpu-1. Notice the flag -G1 to request 1 GPU
$ srun -N1 -G1 -c10 --mem=16gb -p gpgpu-1 --time=12:00:00 --pty $SHELL
Example: requesting 1 node with 10 cpus, 16gb of memory for 12 hours using Tesla V100 GPU in queue name v100x8. Notice the flag –gres=gpu:1 to request 1 GPU
$ srun -N1 --gres=gpu:1 -c10 --mem=16gb -p v100x8 --time=12:00:00 --pty $SHELL
You can view any of the available nodes using the following command:
$ cat /hpc/motd/m2_queue_status
Once done, you will be placed in the compute node, for example node name b001
[yourM2username@b001 ~]$
1.4 Load python module and install Kaggle
Once you are in the compute node, load python/3 module:
$ module load python/3
And install Kaggle
$ pip install Kaggle
1.5 Using Kaggle API
- First, you need to Register an account in kaggle.com
- Sign in to your kaggle.com account
- Click on your Profile on top right and select Account
- Scroll down and select to Create API Token

- The API Token kaggle.json is downloaded to your computer
- Upload the kaggle.json to your M2 account under ~/.kaggle (~ means home directory and . means hidden folder)
scp kaggle.json yourusername@m2.smu.edu:/users/yourusername/.kaggle
1.6 Download a sample project
Now everything is setup, I will go to kaggle.com and select a sample dataset, for example: House price
Select Data Tab, Accept Term & Condition, and scroll down you will see:
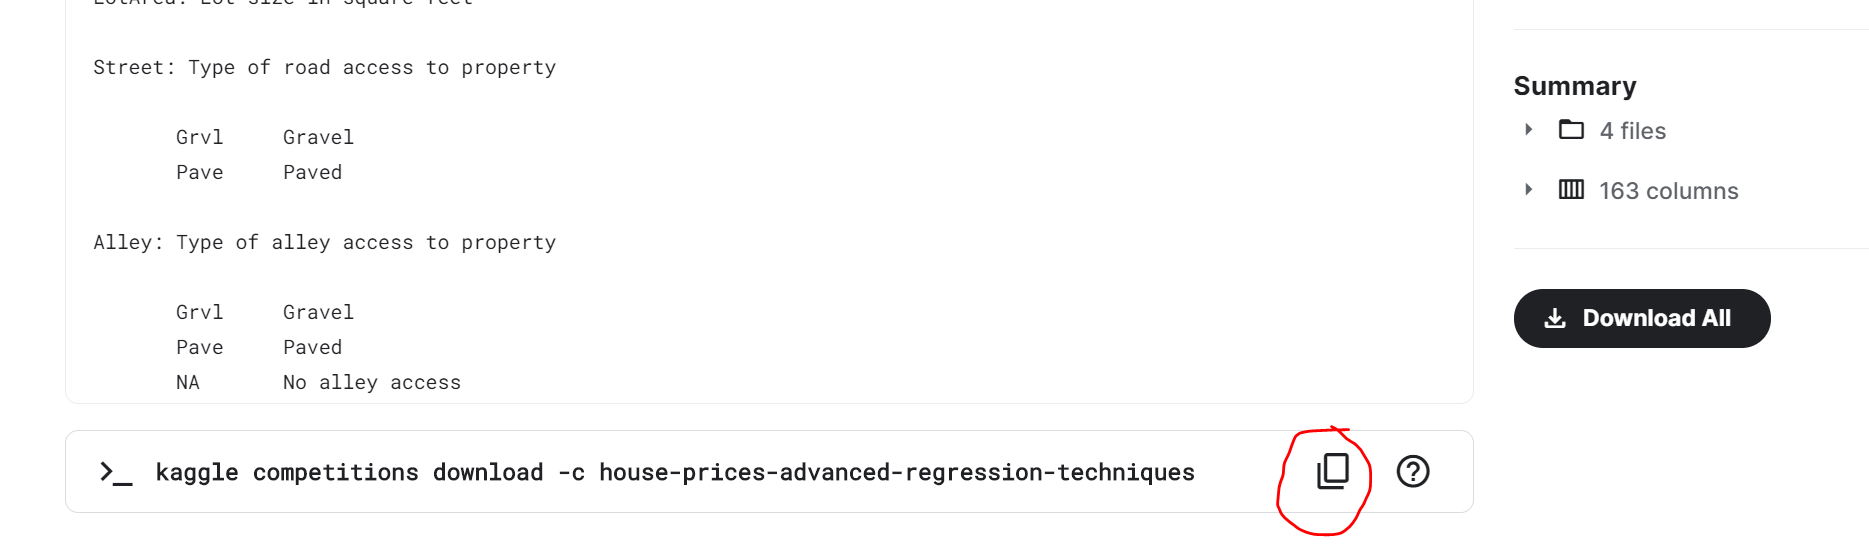
You can Download All to download the entire data to your computer or Copy the link (button in red) and paste to M2 CLI.
Note:: You must Accept Term and Condition prior to download the data, else 403 Forbidden will appear.
1.7 Extract the zip file
If the downloaded file is in zip format you can unzip to new folder:
$ mkdir folder1
$ unzip zipfile.zip -d folder1
Now the data is ready for you to work on it on M2
2. Create scikit-learn Conda environment for Python workflow
The following instruction shows step by step conda installation using CLI (Command Line Interface). You can use any terminal from your Windows/MacOS/Linux system.
Load neccesary library
$ module load python/3
Install Conda environment and scikit-learn to your home directory
Install conda environment named MyKaggle to your M2 home directory ~ with python version 3.8 and pip. Flag -y allows to install
$ conda create --prefix ~/MyKaggle python=3.8 pip -y
$ source activate ~/MyKaggle
$ pip install scikit-learn
Create Jupyter kernel to work in HPC Open OnDemand
$ pip install ipykernel
$ python3 -m ipykernel install --user --name MyKaggle --display-name MyKaggle
Double check with Open OnDemand
Login to you hpc.smu.edu and request a compute node:
You can select:
- Partition: standard-mem-s
- Select Python environment: python/3
- Time (Hours): 12
- Number of nodes: 1
- Cores per node: 4
- Memory: 16 then hit Launch
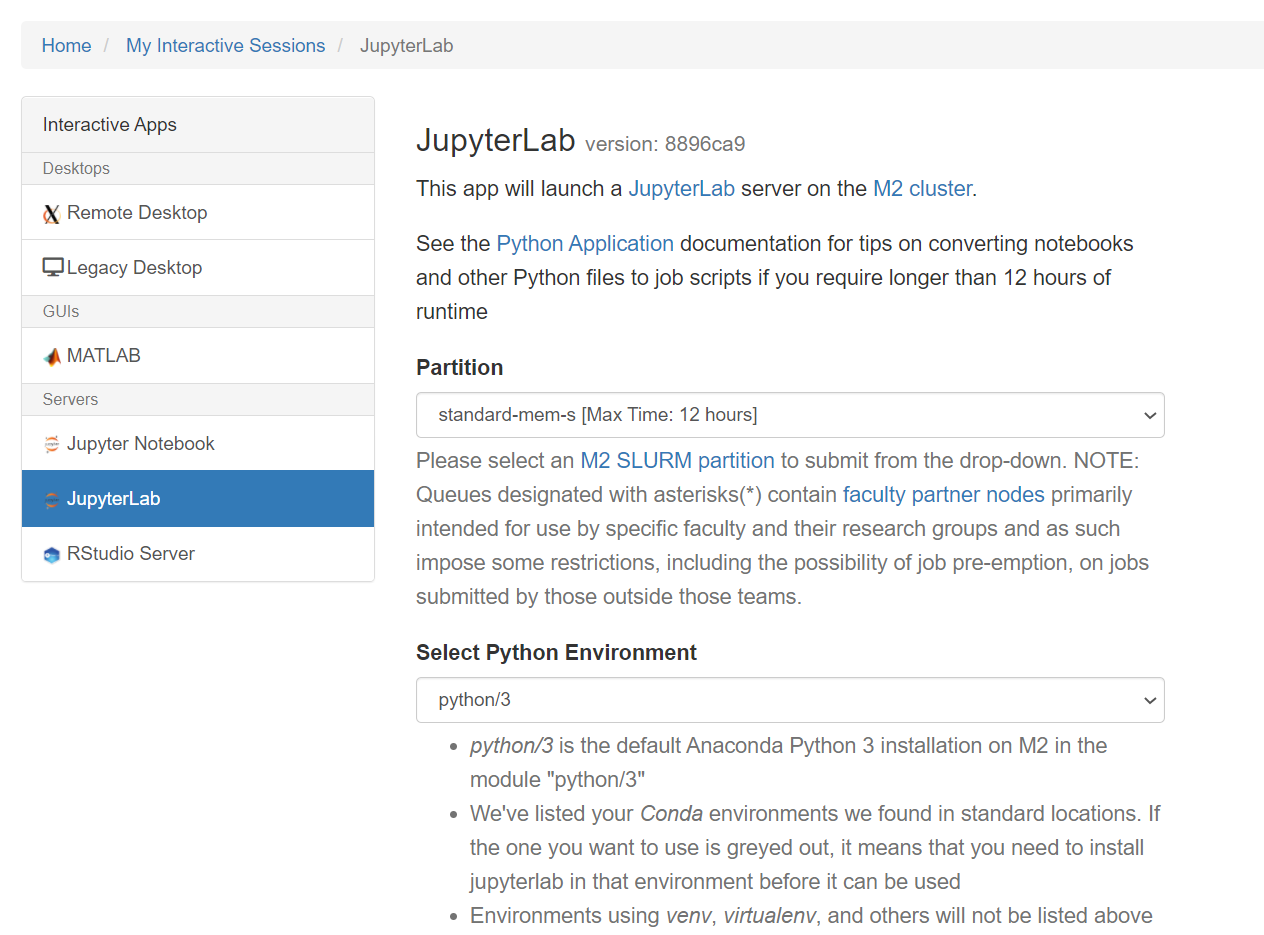
Double check if you are able to see MyKaggle kernel created:
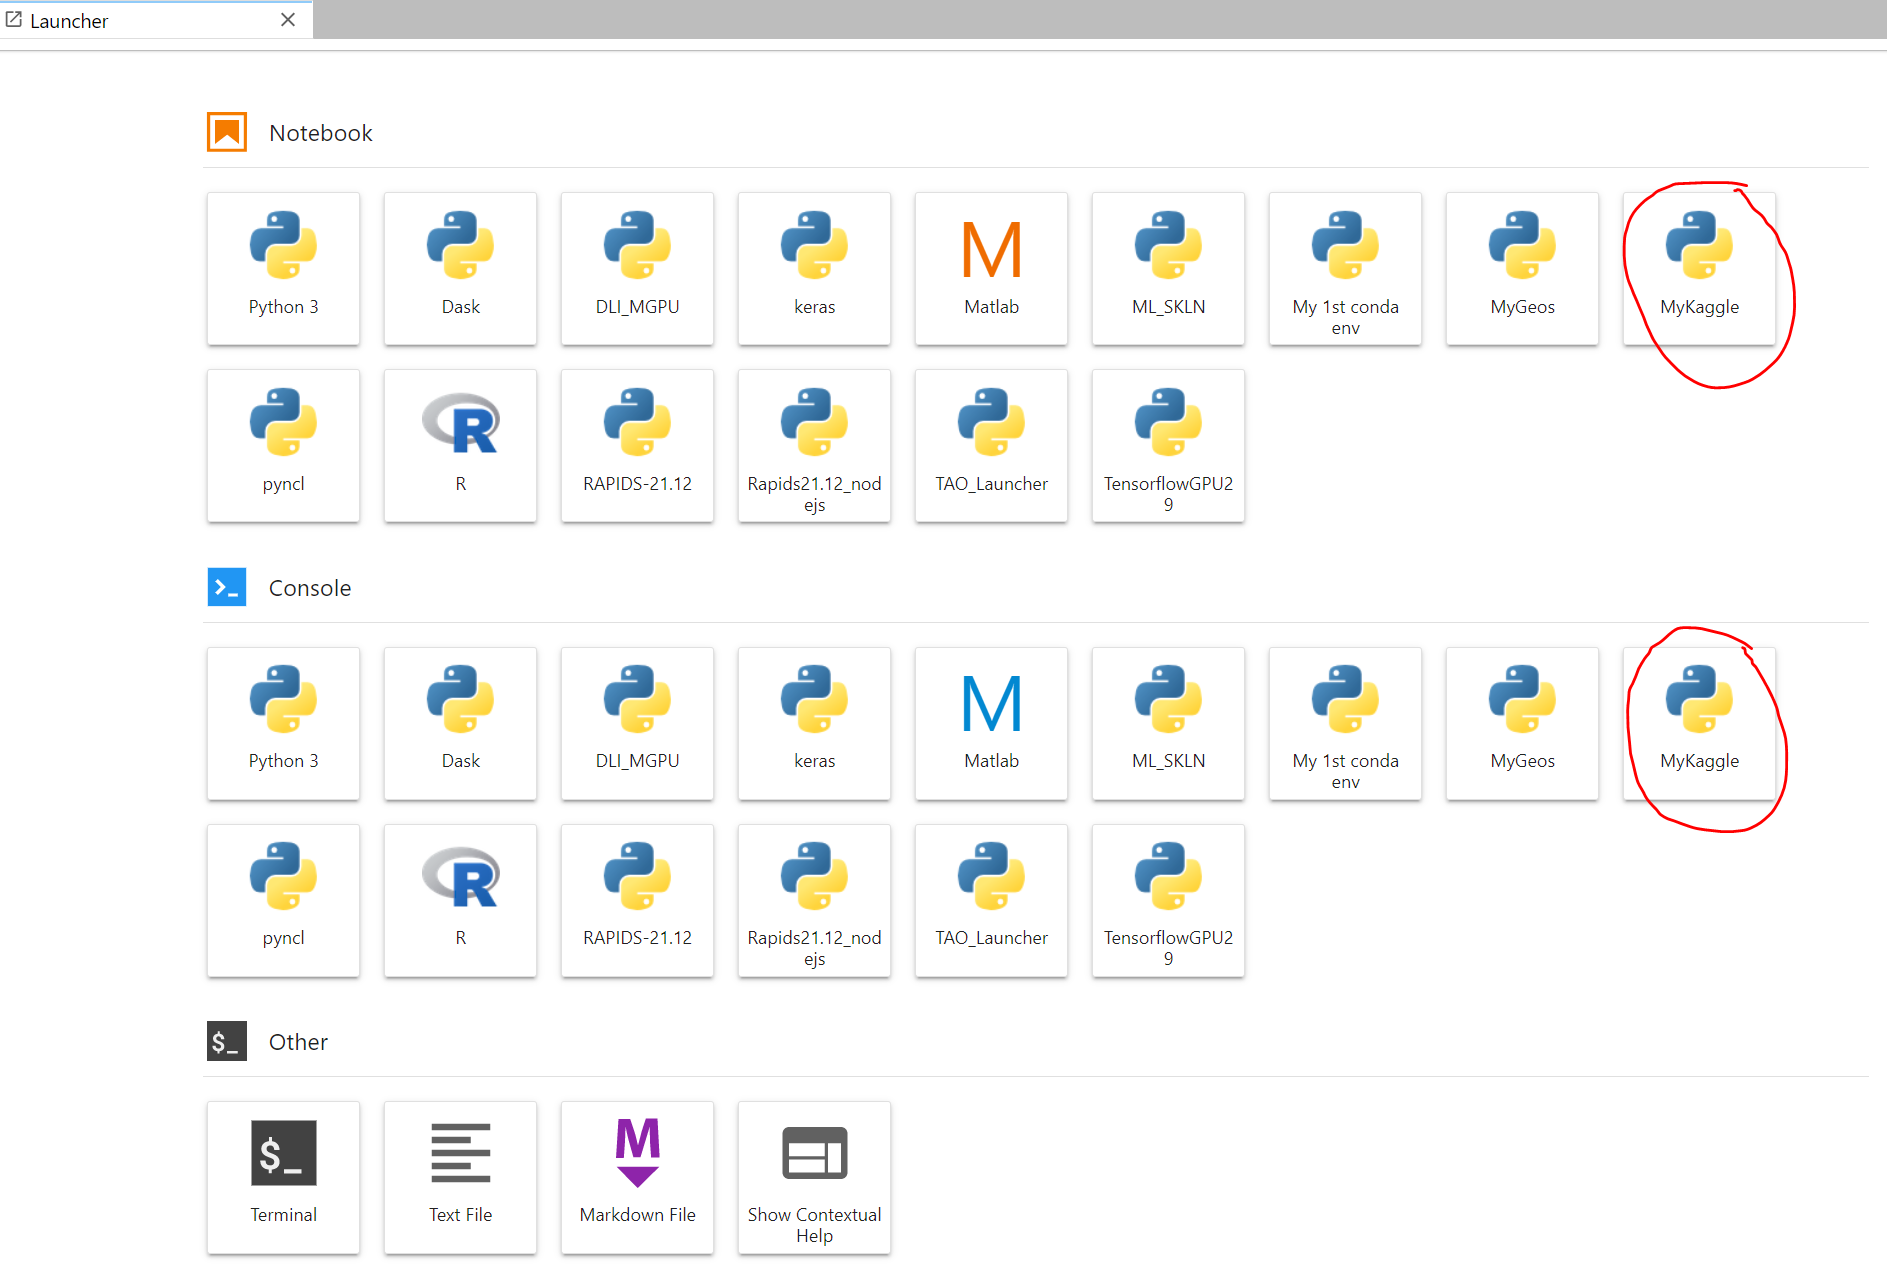
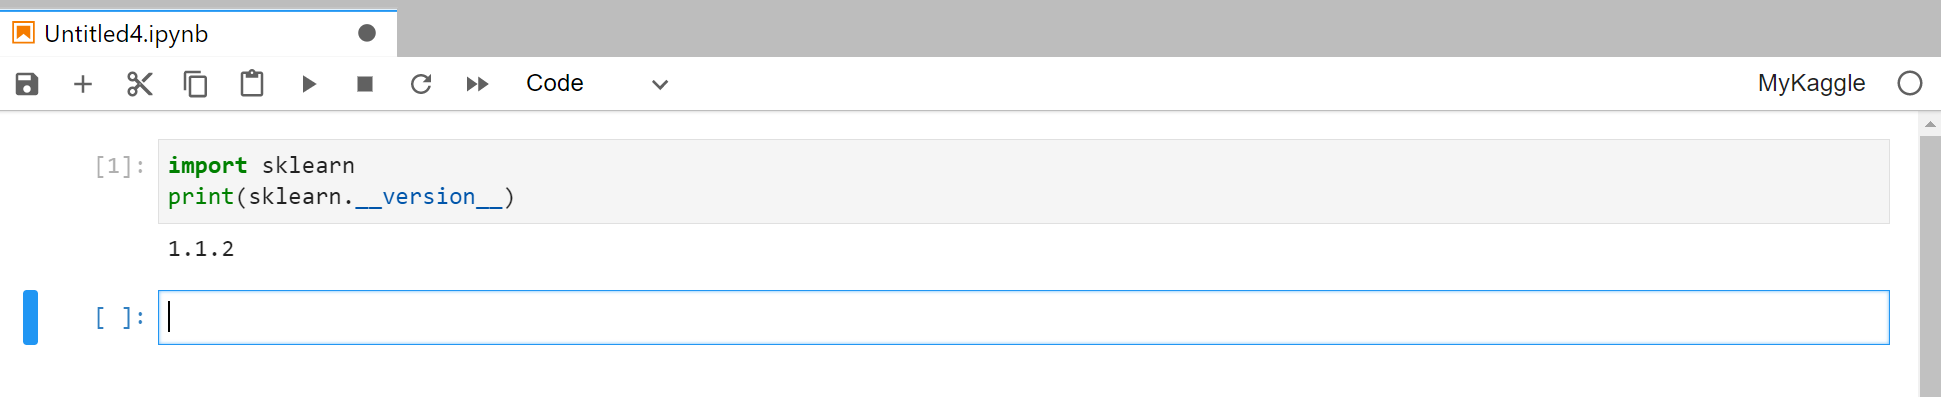
If yes, select the MyKaggle notebook and check if your scikit-learn is installed correctly?