Install ArcPy to M2 JHub
Overview
Teaching: 5 min min
Exercises: 0 minQuestions
How to install Arcpy to ManeFrame2
Objectives
In order to install ArcPy to ManeFrame 2 HPC, one need to install ArcGIS Server. User need to be added to ESRI account (using smudallas domain) in order to be authorized to run arcpy. SMU users, check with Jessie Zarazaga to be added to ESRI SMU server
Following are the steps to install ArcGIS Server
Step 1. Create a license file:
Go to https://my.esri.com/ and login using SMU username/password. Once done, navigate to My Organization (smudallas) and click on Licensing
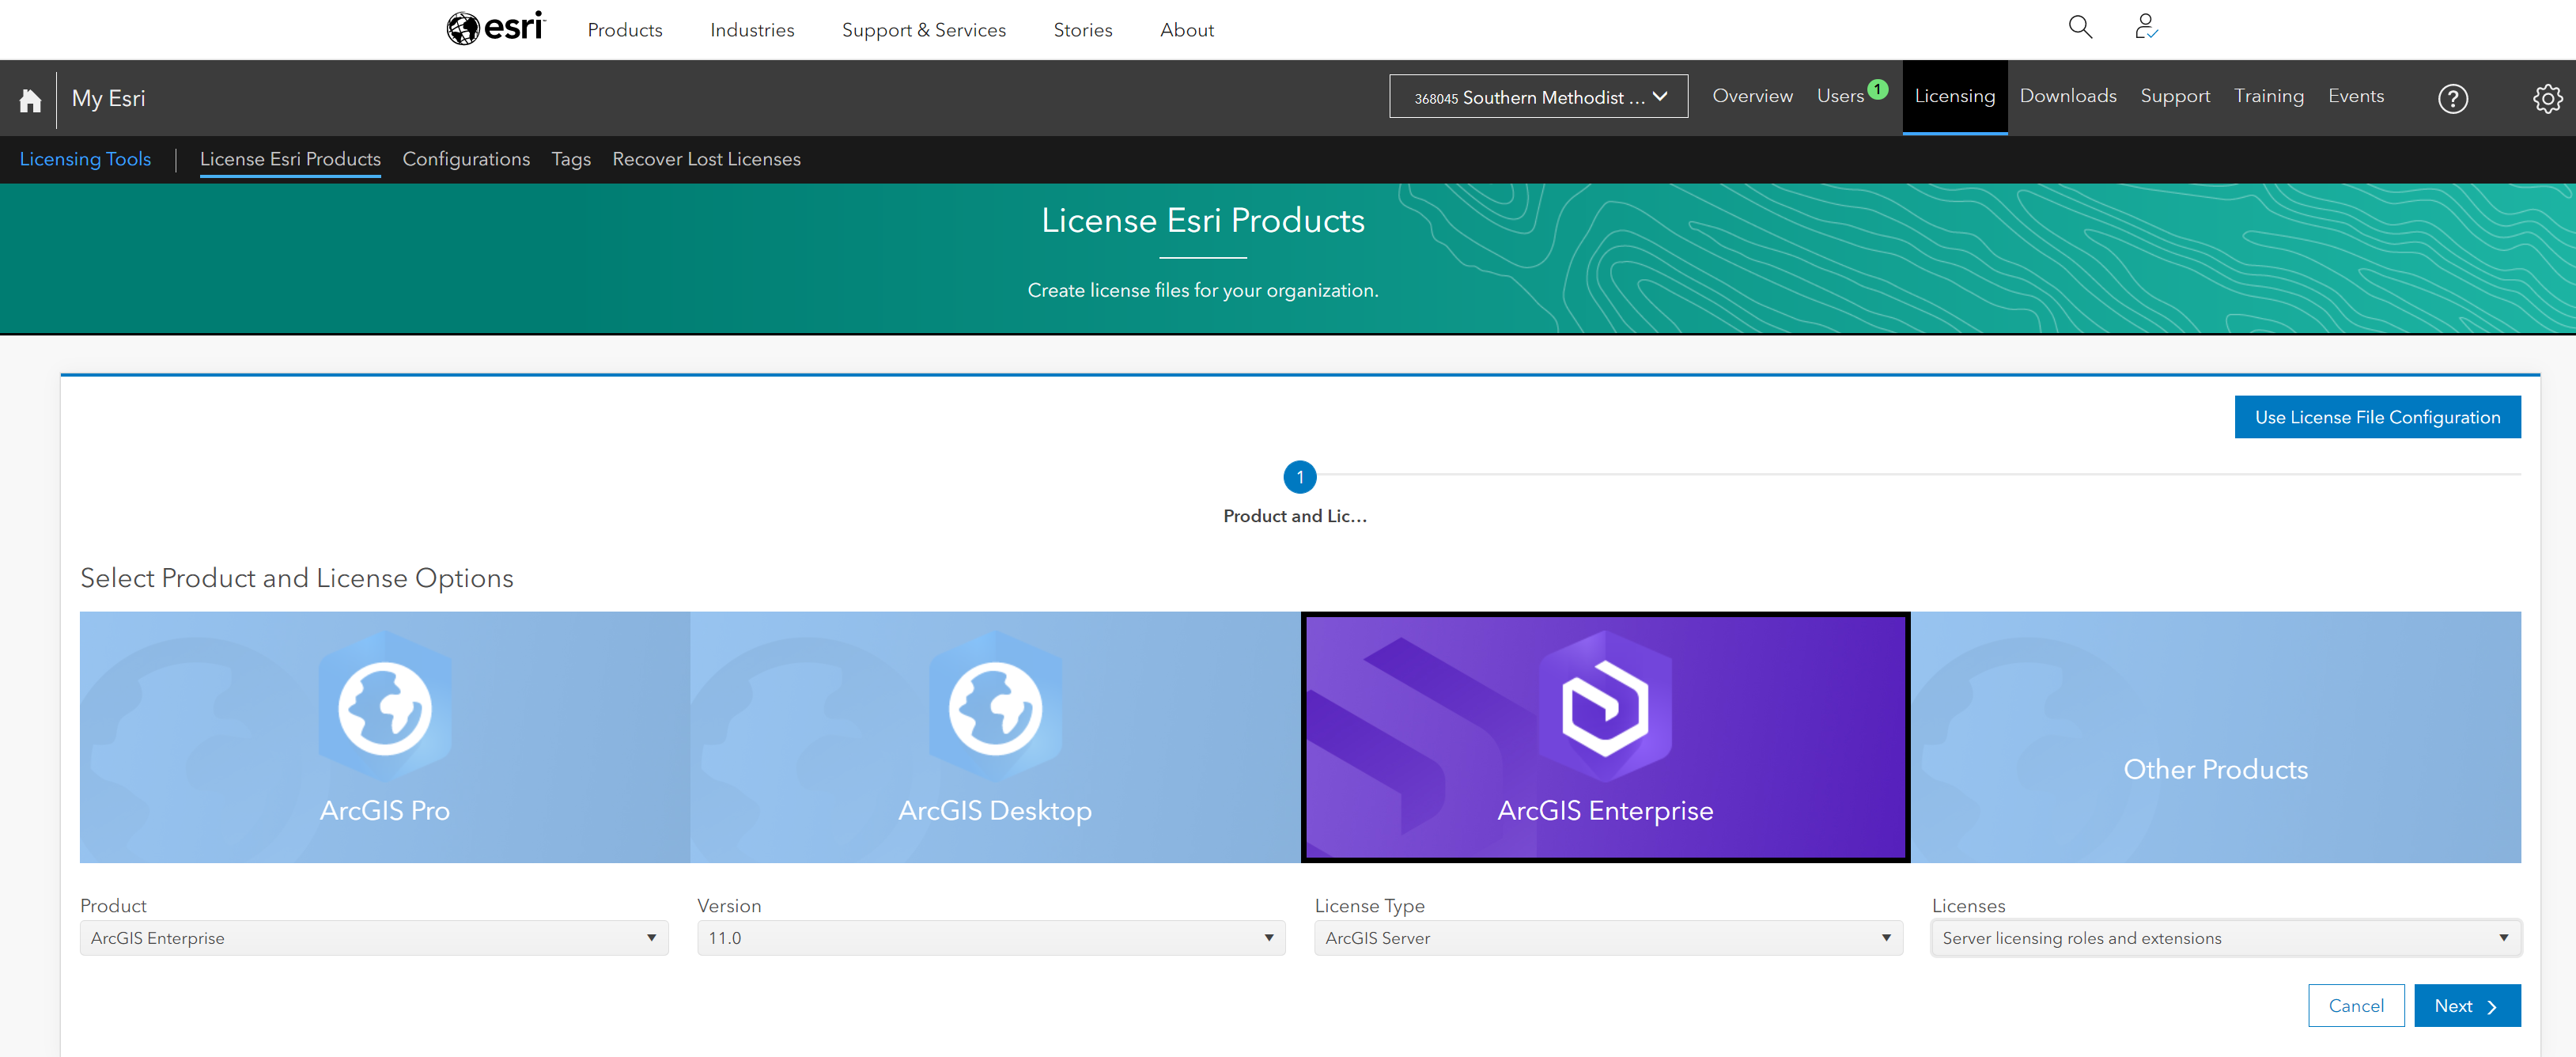
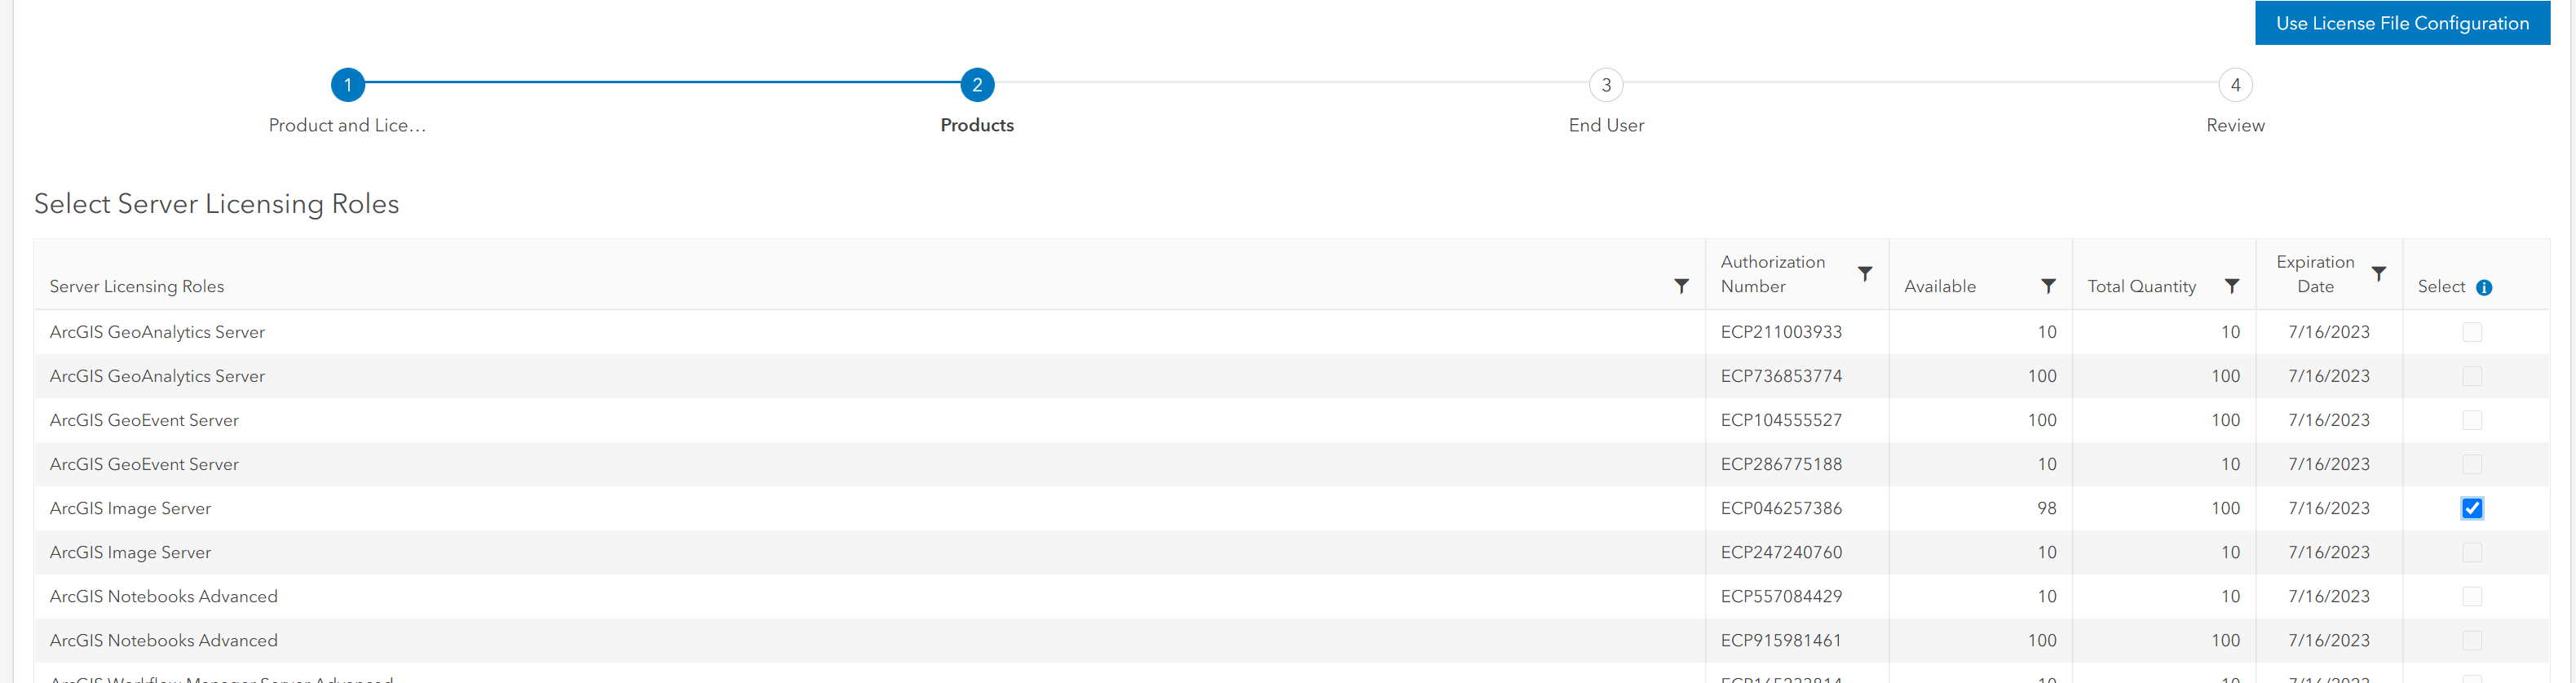
Select the appropriate license:
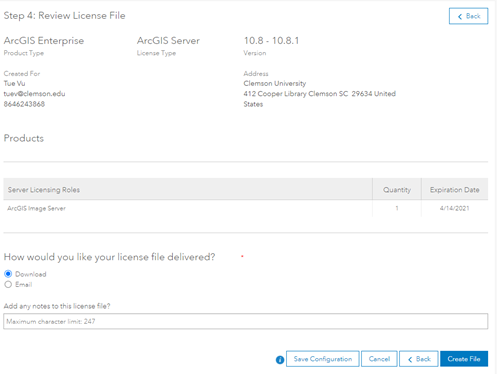
Download the license file:
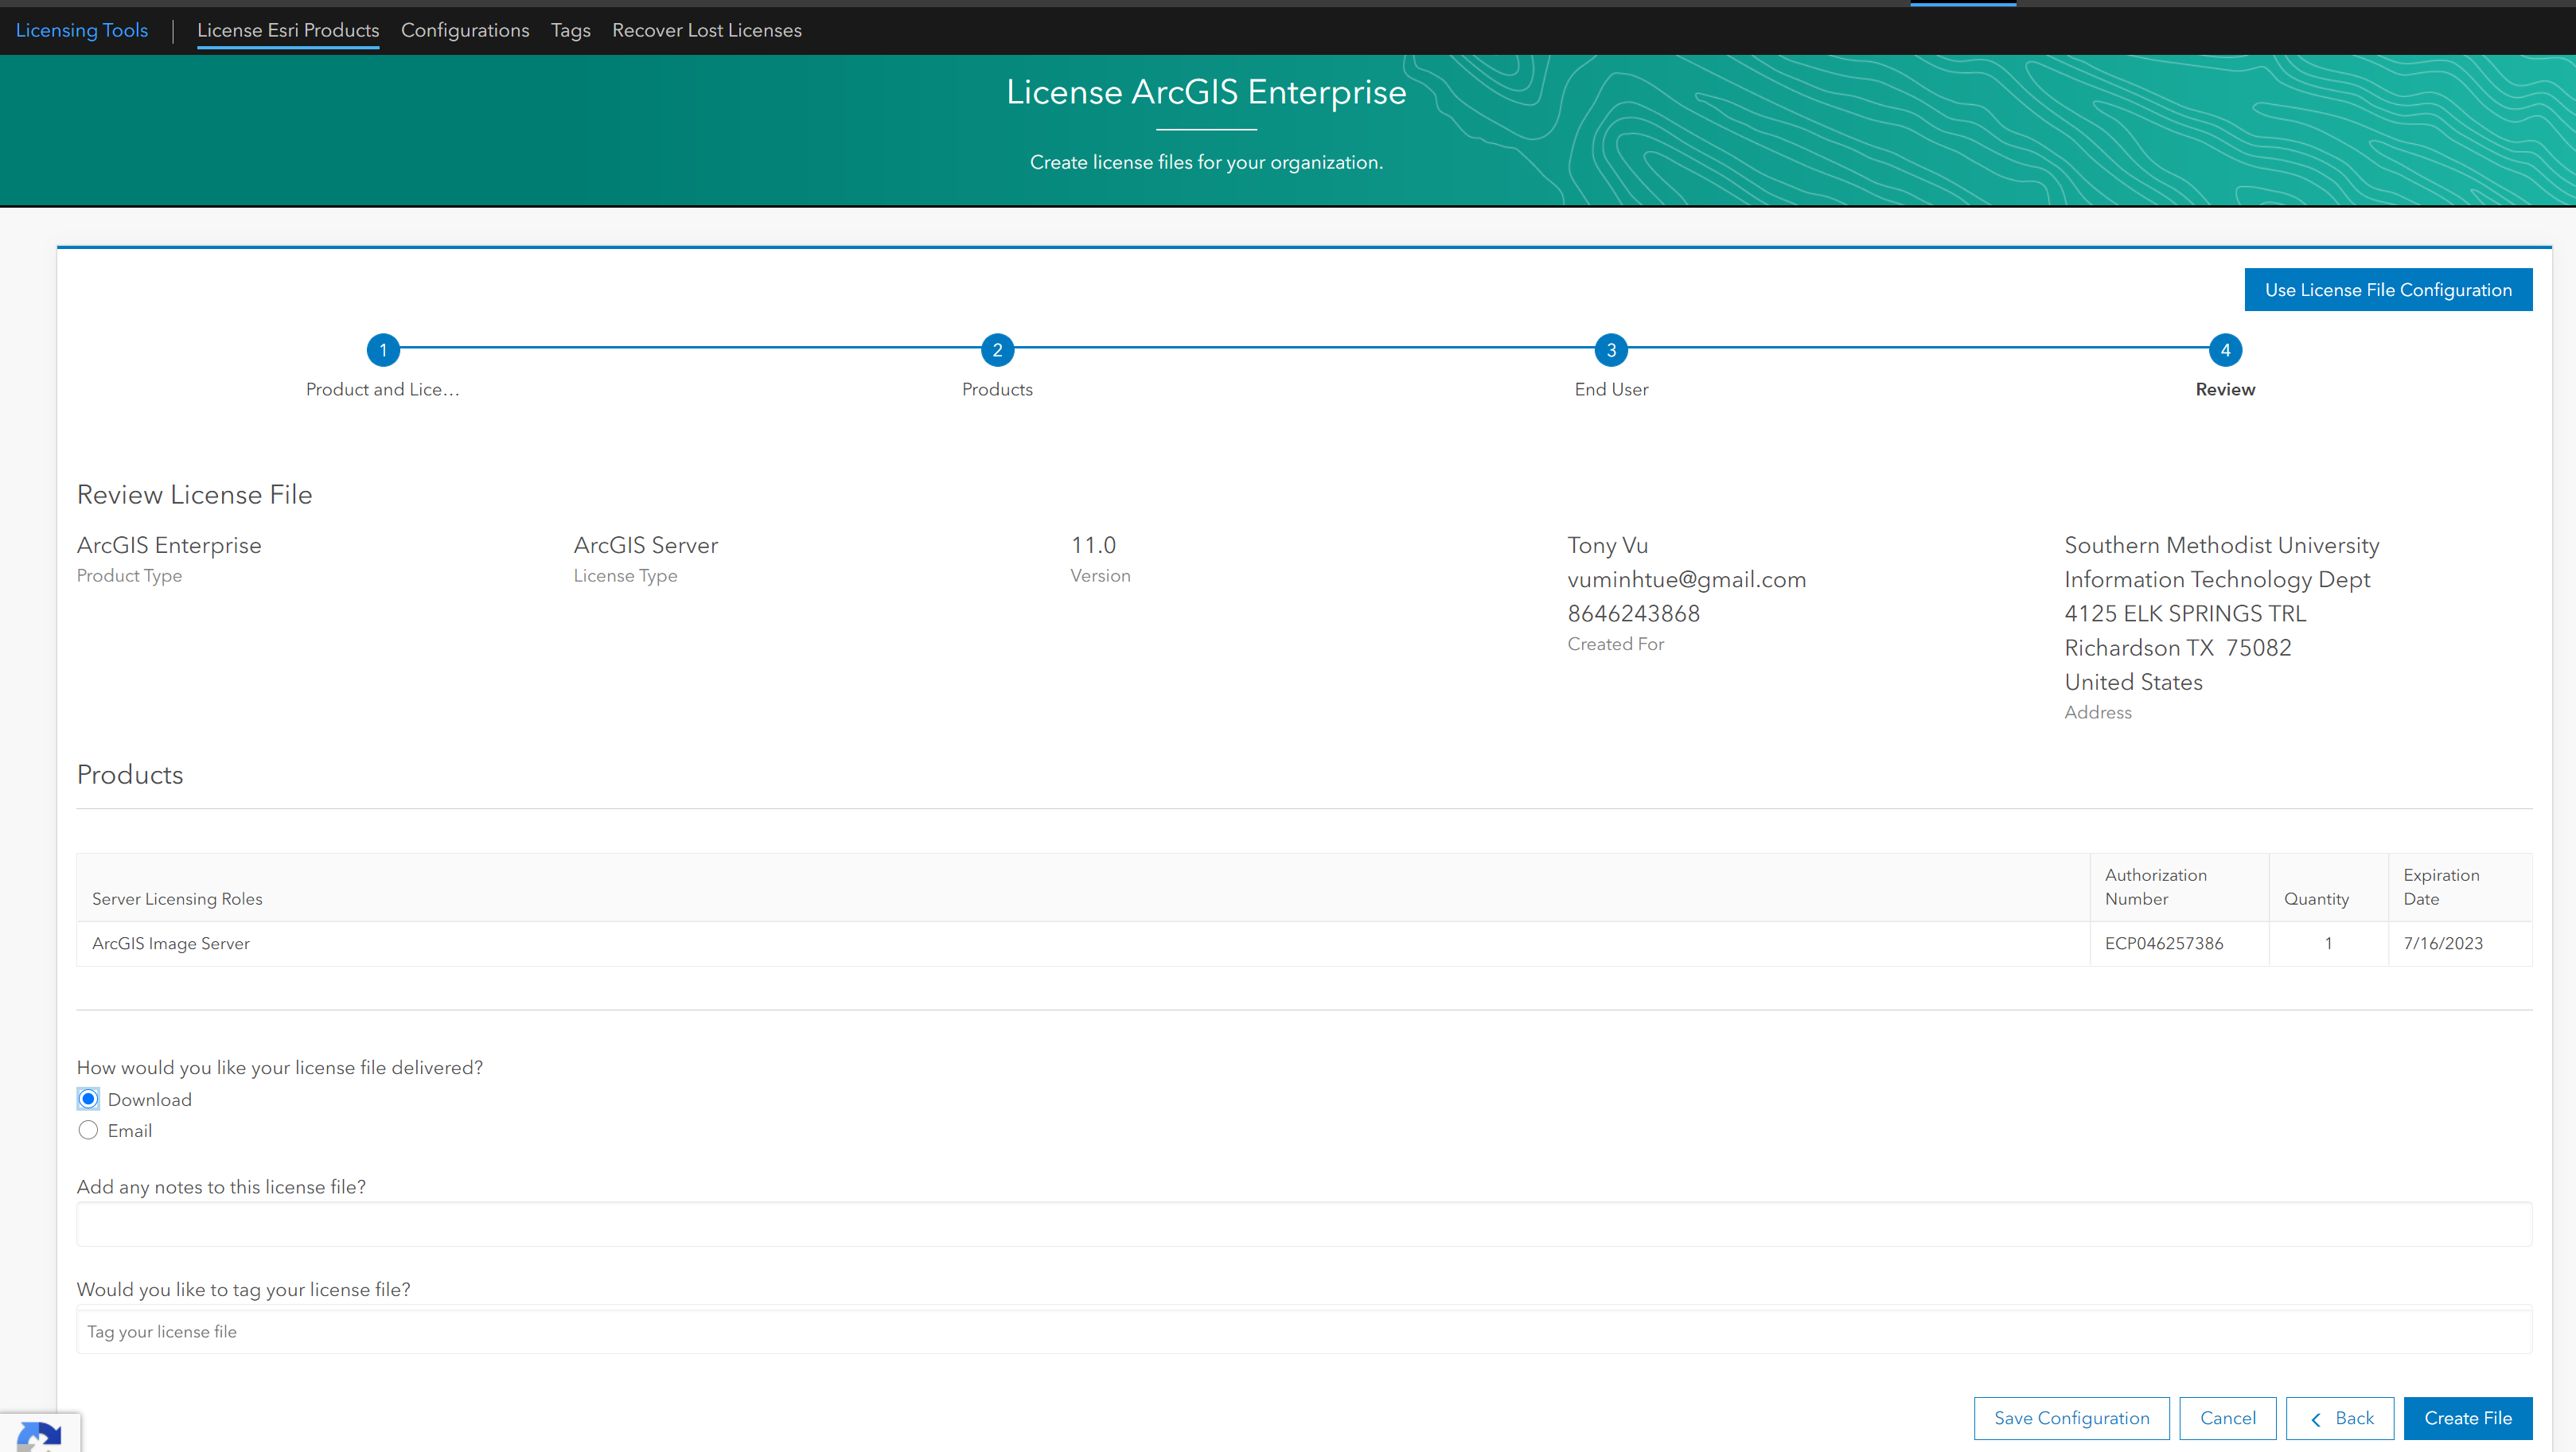
Save it somewhere, for example: ArcGISImageServer_ArcGISServer_1007035.prvc
Step 2. Download ArcGIS Server:
Hover to Downloads tab and select ArcGIS Enterprise Linux to download to M2:
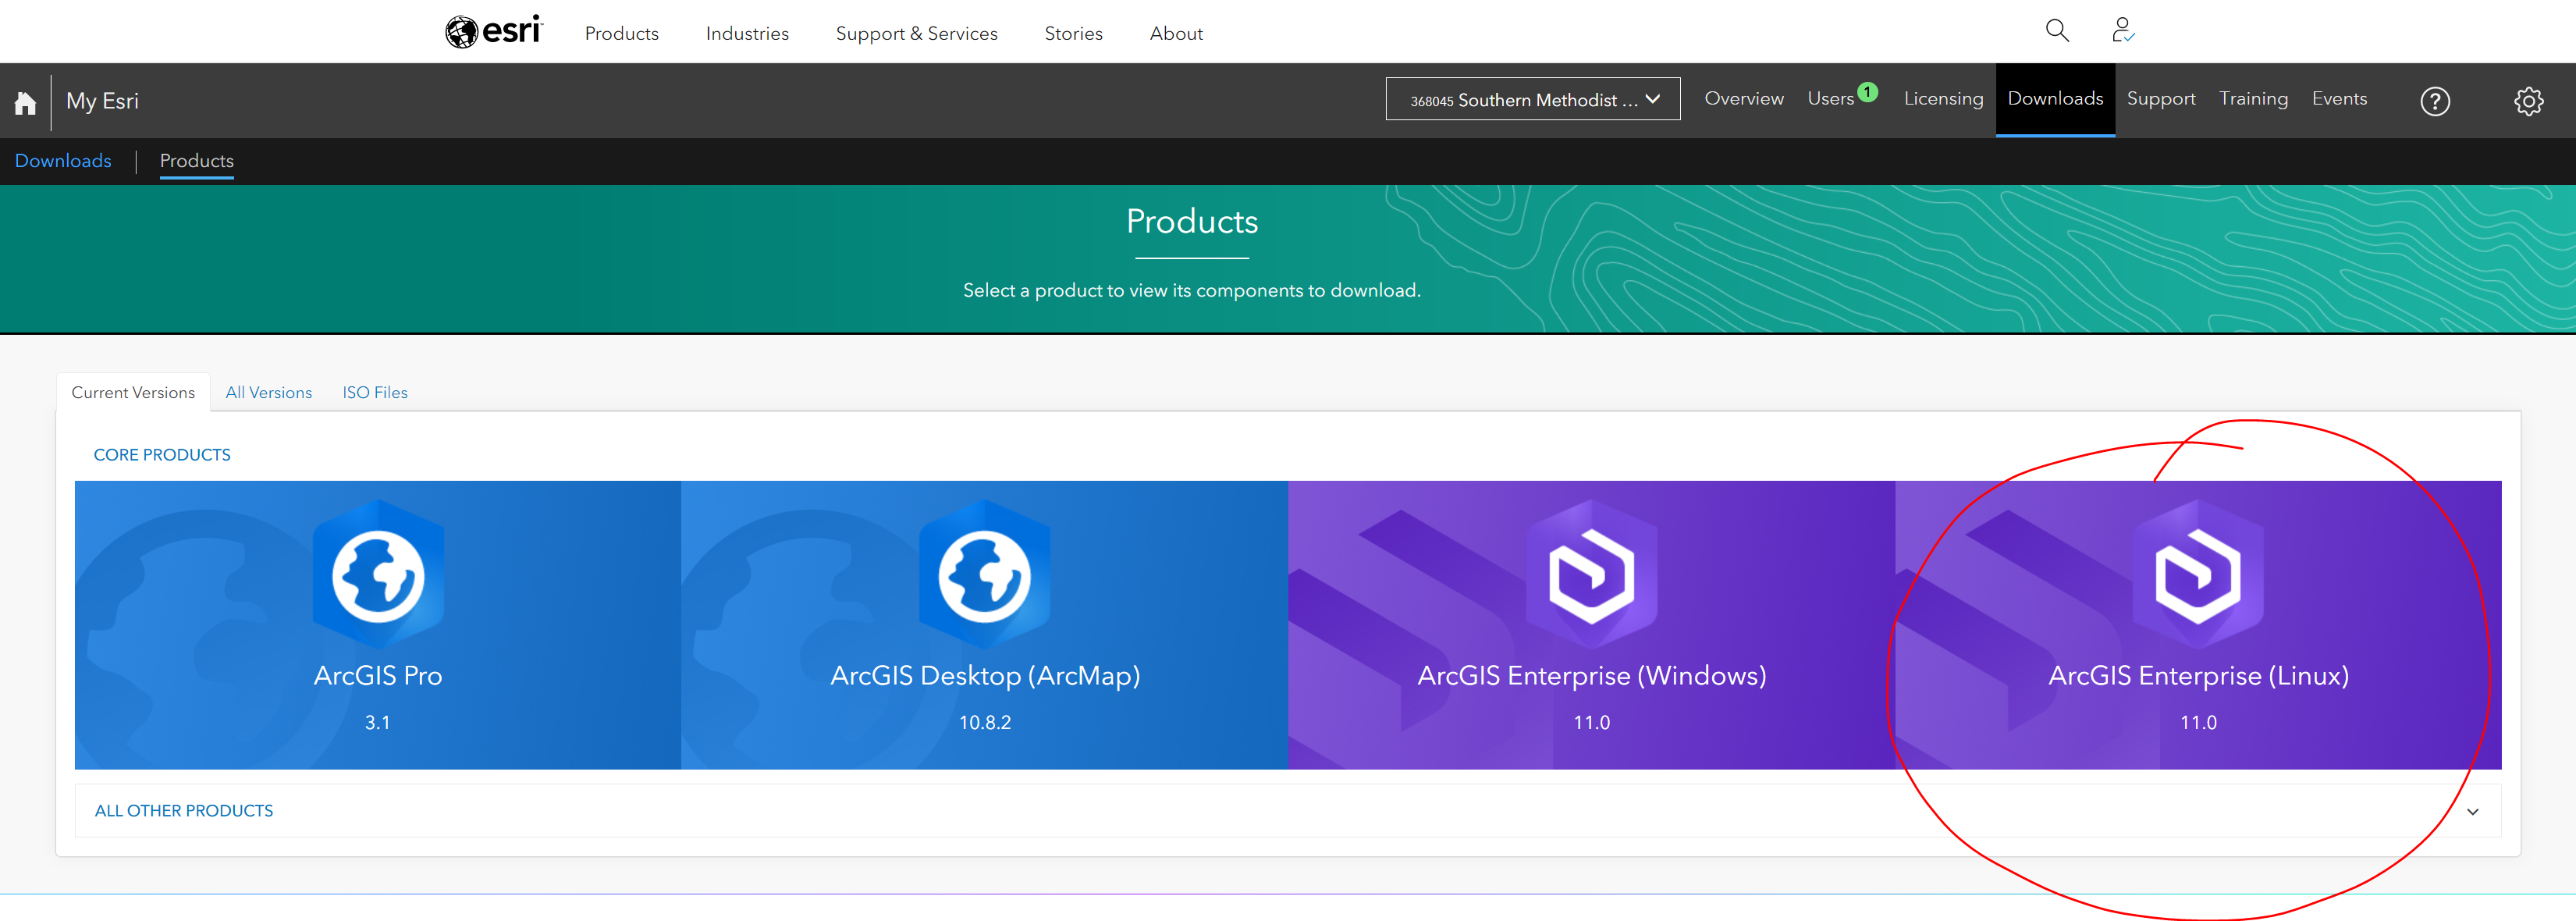
Here I download version 11.0 at the time of writing this document:
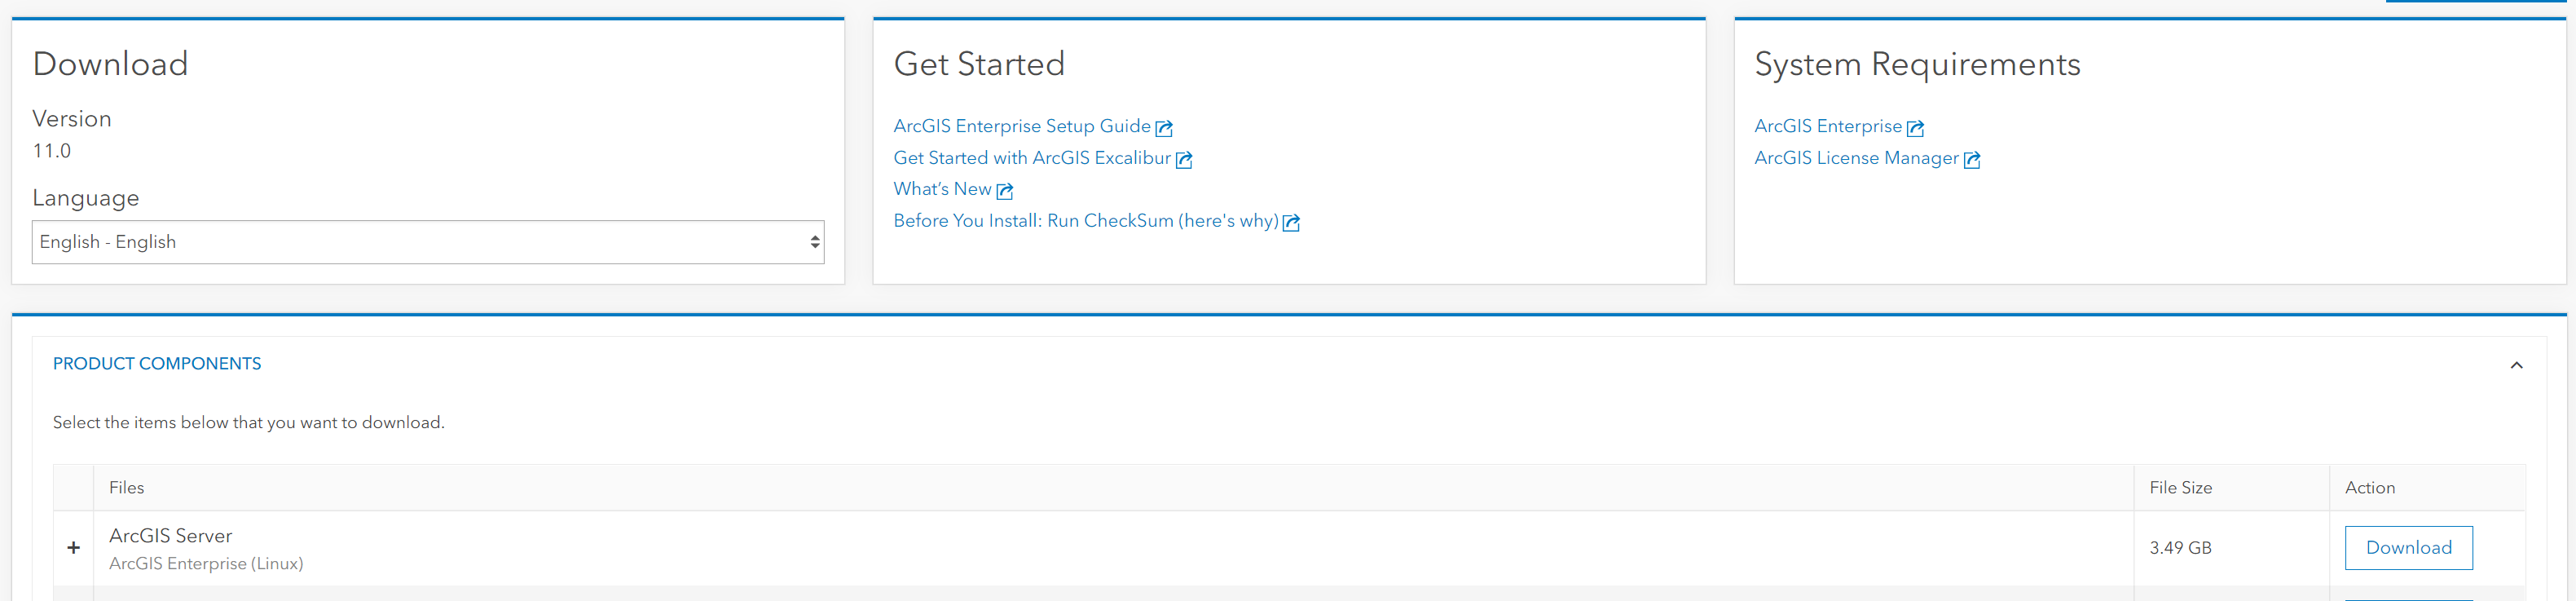
Step 3. Setup ArcGIS Server:
Request a compute node, here I use va001 all the time.
$ ssh -X va001
Sometime you may need to change the Soft and Hard limitation of the node using: Check with Amit or Richard should you need help with the node:
$ ulimit -Hu 26000
$ ulimit -Su 26000
Navigate to installation folder and run Setup file:
$ ./Setup
Step 4. Authorize the license file:
There are 2 ways to authorize the license file from step 1.
Method 1: Using GUI:
- Request a compute node with GUI
- Go to /work/users/tuev/arcgis/server/tool
- Run authorizeSoftware in GUI and select the ArcGISImageServer_ArcGISServer_1007035.prvc from your directory. Check your information and authorize it.
- Make sure that all tick marks are checked for the authorization:
- Testing by running:
$ ./authorizeSoftware -s
Method 2: using silent mode.
$ ./ authorizeSoftware <-f .prvc> <-e email> <-o filename.txt>
Upload the filename.txt to esri website (following its instruction) to obtain the license file: authorization.ecp Validate the license:
$ ./authorizeSoftware -f authorization.ecp
Make sure it works:
$ ./authorizeSoftware -s
The GUI appears for you to manually install ArcGIS Server to your /home/username/arcgis directory
Step 5. Install conda environment:
Request a compute node without -X
$ module load python/3
$ conda create -n arcpy_env -c esri arcgis-server-py3=11.0
$ export ARCGISHOME=/work/users/tuev/arcgis/server
$ source activate arcpy_env
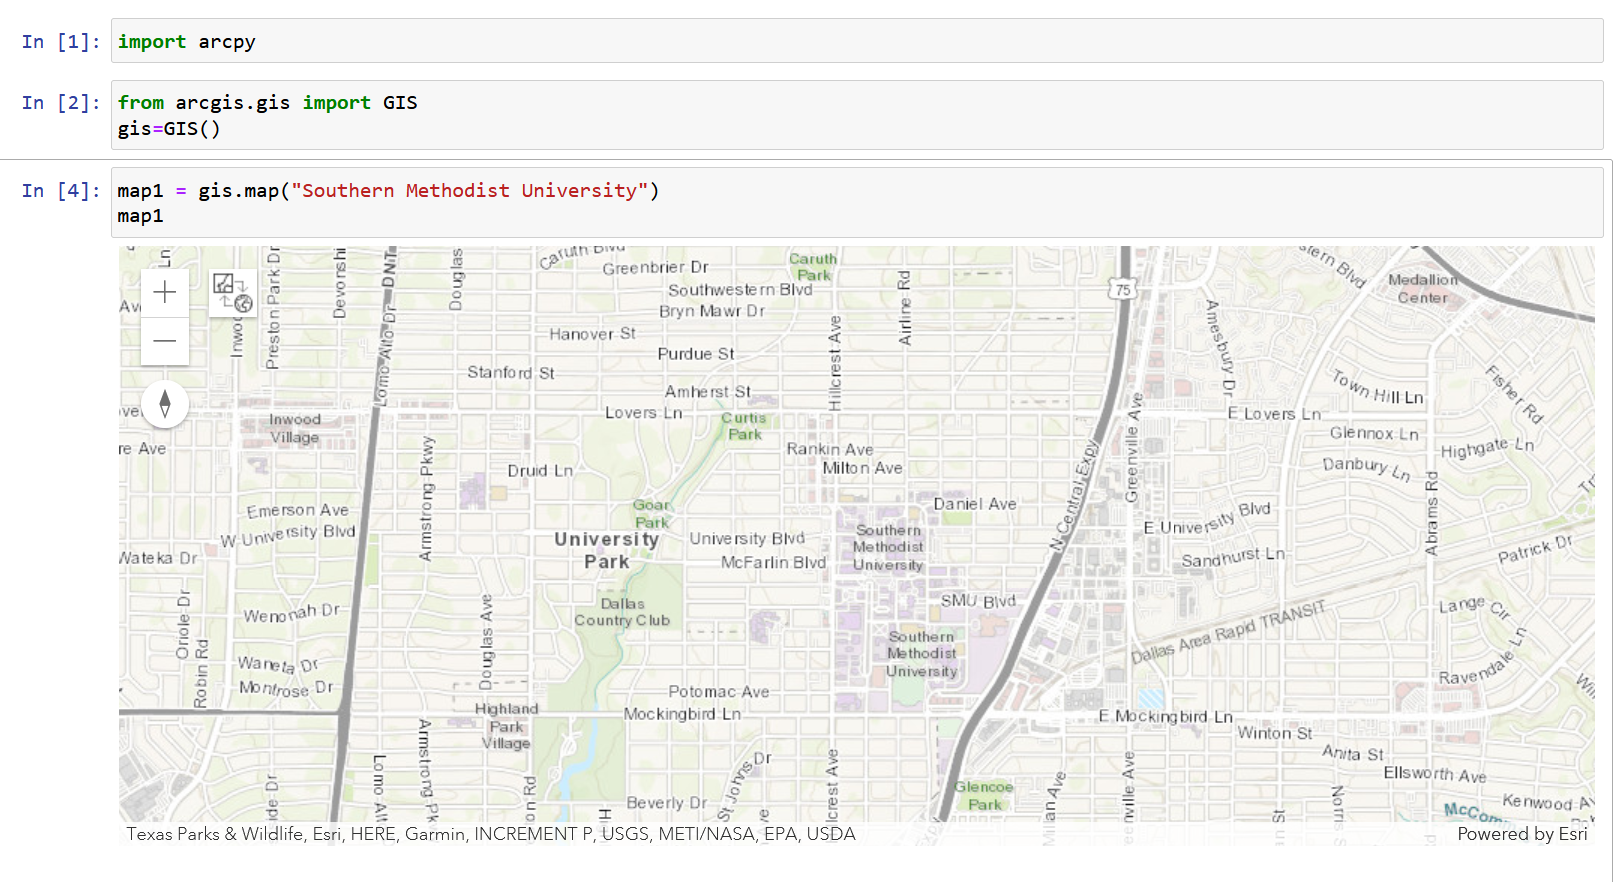
$ import arcpy
Test to make sure it works
Step 6. Create Jupyter Kernel:
$ source activate arcpy_env
$ conda install -y -c conda-forge kernda
$ python -m ipykernel install --user --name arcpy_env --display-name "ArcPy11"
$ kernda /users/tuev/.local/share/jupyter/kernels/arcpy_env/kernel.json -o
Modify /users/tuev/.local/share/jupyter/kernels/arcpy_env/kernel.json and make sure the following lines are added:
{
  "argv": [
    "bash",
    "-c",
    "source \"/software/spackages/linux-centos8-x86_64/gcc-8.3.1/anaconda3-5.1.0-c3p5et4cpo7jaiahacqa3pqwhop7tiik/bin/activate\" \"/home/tuev/.conda/envs/arcpy1\" && exec /home/tuev/.conda/envs/arcpy1/bin/python -m ipykernel_launcher -f '{connection_file}' "
  ],
  "env": {"ARCGISHOME":"/work/users/tuev/arcgis/server"},
  "display_name": "MyArcPy510",
  "language": "python"
}
Step 7. Use Port-Forwarding and Request for Jupyter Notebook running on M2/SuperPOD
Key Points
ArcPy